Updated 10.2.20
*This post contains some affiliate links. Please see my full Disclosure Statement.
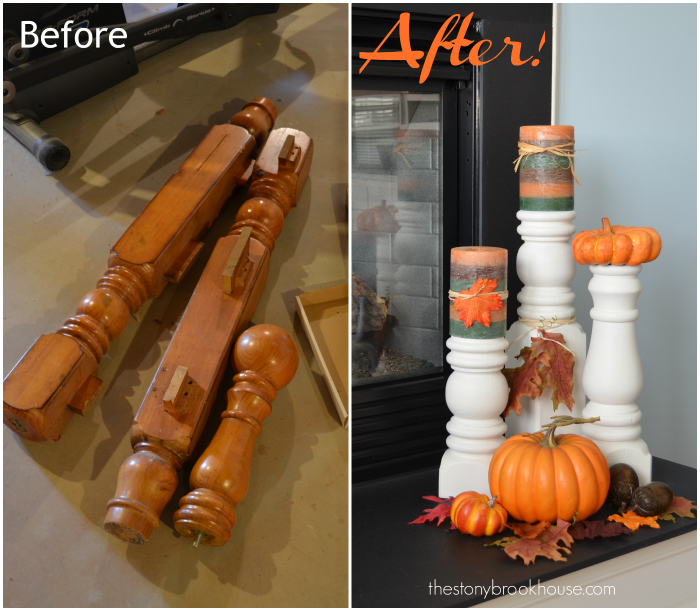
Who would've thought you could make candlesticks from bedposts.

These old bed post things have been lying around in my basement for a couple
years. One of our tenants left them when they vacated their apartment. I
figured I could do something with them. I didn't have the heart to throw
them away.
The bed rails must have been sawed off and disposed of... so the first thing
I need to do is remove the supports.

I removed the screws and tried prying one off. That didn't work so
well... so I'm going to use the multitool to remove the rest
of the material.
That worked perfect! That looks so much better!
Here are the posts all cut up. Hubby, of course, helped cut them on
the table saw. 😍
We cut one of the bases in half to attach to one of the posts.
Now, they are all ready for paint. I like how they are all different
heights.
First, prime then paint. My favorite primer is
Zinsser Bulls Eye Primer. It's basically magic!
For the finished look, I used my DIY Chalk Paint Recipe. Two coats and they were done!


They look amazing
ReplyDelete