*This post contains some affiliate links. Please see my full Disclosure Statement.
We designed and planned and built this bathroom. Before the design stage, we knew we wanted a larger shower than we had at our Stonybrook house. Especially since we had been enjoying our super large Janky Jacuzzi Shower.
We had two things that were a must in this bathroom. A larger shower and a 'water closet'. If you want to see our plans and where we studded up the walls, you can click this link, The Master Bath is Framed.
We spent a LOT of time trying to think of all the things in regards to a shower. It's more than you think. It was much more than we thought!
First of all knowing and realizing your skill set is important. We've done a lot of home renovations and we weren't even sure if we should tile the shower or hire it out. But after some encouragement from a friend and watching some YouTube, we felt actually confident we could do it! 👍 Would it be easy? Probably not, but we can do hard things!
During framing, we decided to add a ledge the length of the shower. We needed to consider the height of the ledge with the width of the tile and grout, so that we didn't end up with slivers of tile. We thought we had it right, but we were off a bit. It was not easy to judge that exactly. I'll discuss it more later on.
We decided not to build our own shower pan. There's a lot to do in building a shower pan and we really didn't want to take that job on. We both felt buying a prefab shower pan was right for us.
Then we discussed size - There are a ton of sizes to choose from for a prefab shower pan. We chose a 34"x 60" shower pan with a right side drain, instead of a middle drain. (I just don't like stepping on a drain in the shower.)
It was fairly easy to do. We installed the shower pan on a bed of mortar, just like we did with the tub in the guest bathroom. The most important thing is to make sure that the shower pan is level. You don't have to worry about the slope to the drain because it's already designed in the shower pan.
We added window and door flashing to the bottom edge of the shower pan, just another piece to help with waterproofing.
We purchased Hardiebacker Cement Board for the walls of the shower. We used the 1/4" cement board with 1/4" shims (on the studs) to meet flush with the drywall. That's one of the things you need to consider when you're building a shower. How is the cement board going to meet with your drywall?
This question came up on us after we started. We knew that the thickness of the walls would have to meet flush. We questioned how did the tiles end on the cement board/dry wall? We had to figure out what kind of edge would the tile have? Did we want a bullnose or was there another way?
We were planning to do a bullnose for the edge, but that then affected how the tiles fit width wise. We are using a 4x12 ceramic tile. So, when we measured out the tile pieces on the wall, if we used a bullnose, we were left with a sliver of tile on the inside corner. We don't like slivers of tile. It just looks unprofessional.
So, we chose to use a Schluter Jolly Matte White PVC edge. They come in all sorts of styles and finishes. It was tons cheaper too! I picked up two 8ft. pieces for about $13. Bullnose tiles were $2.99 each.
After I taped and mudded the seams, the next step was to waterproof the cement board. I did 4 coats of the Aqua Defense rubberized coating.
Let's talk about the first layer of tile.
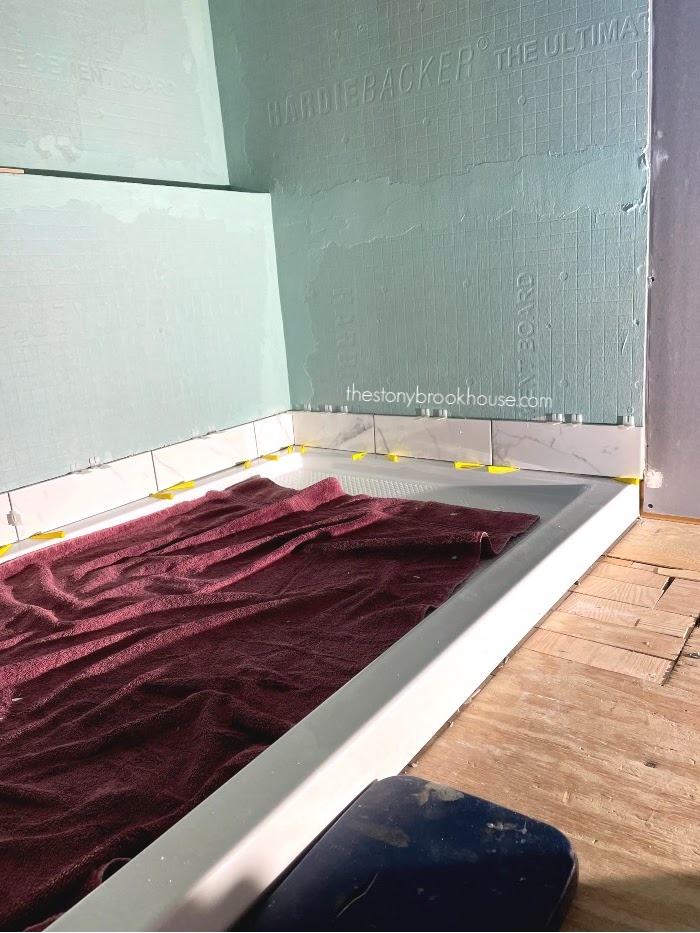
The first layer of tile is the most important. If that layer is as close to perfect as possible, then the rest of the shower should be close also.
You need to find your lowest point and start there. Using a laser level was a game changer. It made keeping the tiles level soooo much easier. This is the one we purchased on Amazon. Laser Level
Our right side front corner was our low point. So, that is where we started with a full tile. Then as we moved our way around that first layer, we had to shave some off the bottom.
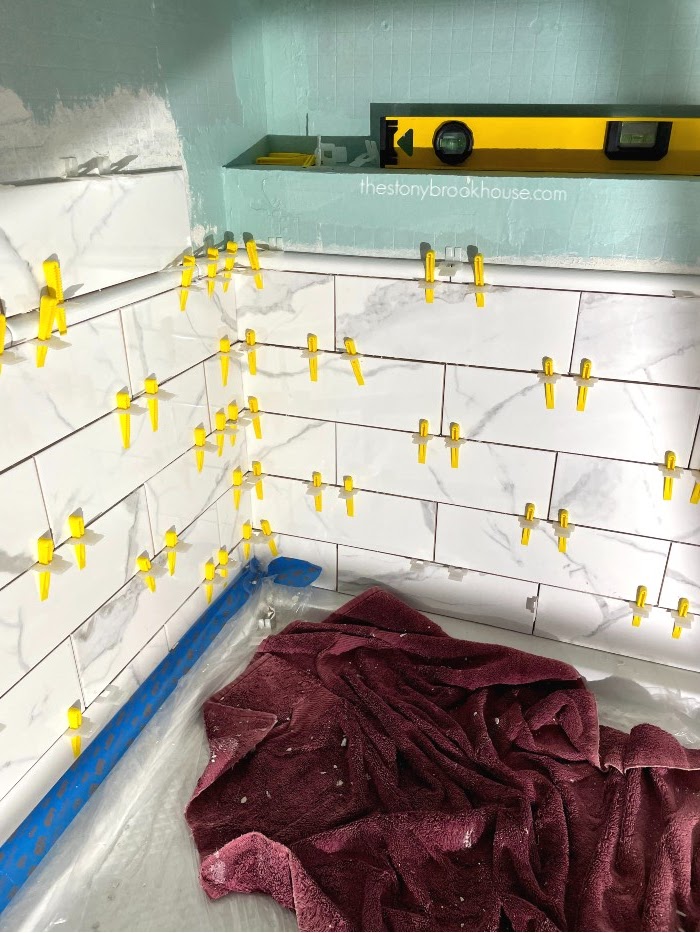
We dry fit the whole first layer before we attached the tiles with thinset. Once we had all the pieces cut, then we back buttered each tile and set in place. It is recommended to let it dry overnight. Since we are weekend warriors, it set until the following weekend. Once dry we had a nice solid layer to build upon.
Being that we aren't professionals, the last thing we wanted was to keep on going and see our tiles begin to slide. Then everything would be off. It was better for us to wait and let it dry.
Okay, let's talk about the ledge. Even with all of our measuring we still were off about an 1". (So frustrating!) But we were able to camouflage it by adding a pencil trim. We still had to trim the bottom edge of the tile meeting the pencil trim, but it's so slight that you'd never notice.
Here's another another question you need to think about. How is the ledge is going to meet with the tile coming up the wall. You don't want the raw edge of the tile showing.
We decided to use a bullnose tile. A bullnose tile has an edge that curves down and then you can use it to cover the raw edge of a tile coming up the wall.
Another question you need to consider is where the shower fixtures are going. (You really need to have an idea during framing, so you can plan all of the plumbing.) We had to plan where we wanted the control valve, shower head, and hand held wand. We wanted the valve on the opposite side of the shower head, so it would be easy access to slide the door open and turn on the shower.
These fixtures have to be configured and in place, so that you know where to cut the cement board and tiles. Also the valve needs to be the correct depth to include the tile so that the cover will be snug and tight.
We spent a lot of time thinking and planning out this shower. I still question if I've covered all of it here in this post. There is a lot of information here. Again we are not professionals, but we have learned a great deal in building this shower. I hope this has been helpful to you.
Blessings,
Lori


hi Lori!! Would love to see some more pictures of how you framed the shower ledge, if you have them! There's a lot out there about how to install a niche, but I love your ledge idea, it seems much more straightforward! Did you all slope it so that the water wouldn't pool? I'm thinking that you would've needed to slope the framing itself? Any tips or instructions that you could give my husband and would be awesome! Thanks :)
ReplyDeleteThanks so much Ashley! We actually had to do the ledge. Whenever they added the addition to this house. Where it met that was actually a slight slope, so we needed to pull the shower pan away from the wall to sit level. The ledge just seemed the logical solution.
DeleteWe just sorta built a mini pony wall with supports. And yes, we did slightly slope it so that the water wouldn't pool. We also had to redo some of the tiles because they were too level. It was a process of just rechecking the slope.
Thanks for reading! If you have anymore questions, feel free to email me thestonybrookhouse@gmail.com
This post is super helpful for anyone considering a shower renovation! It's great to see the emphasis on planning and understanding your skills before diving in. I love the idea of adding a ledge for convenience—it makes such a difference! Can't wait to see how your shower turns out!
ReplyDeleteThanks so much!!
Delete