*This post contains some Amazon affiliate links. As an Amazon Influencer, I earn from qualifying purchases. Please see my full Disclosure Statement.
I will have to say that we were slightly intimidated by this project. It took us a bit to figure out how it was going to all work out.
Our Samsung Bespoke Fridge has very large doors and how they open made the project a little complicated. But we thought of a solution. We initially wanted the fridge enclosure to come all the way to the doors, but that's what was making it complicated.
So, we decided to just make the enclosure the same depth as the cabinets, 24" deep. That made the whole process much easier, now we weren't dealing with the doors. It actually worked out perfect, and we saved ourselves some $$, too!
We wanted the side of the fridge enclosure up tight against the counter. Well, there was a slight lip to the counter. Fortunately, the countertop was only caulked onto the cabinet, so it lifted off pretty easily. Do you remember our counters being installed? (Countertop Installation)
Now, since the enclosure was only going to be 24" deep that meant we only had to purchase 1 sheet of sanded plywood. Which is running over $80 per sheet. We could just cut the 4'x8' sheet of plywood in half and it would cover each side of the enclosure. Yay!
I decided early on after the Microwave Cabinet, that I wasn't going to skimp on the plywood. I had to sand and sand and sand that plywood for the microwave and it still wasn't perfect. It worked out, because you can't actually see any of the plywood.
But for this project, that is all you're going to see! The sanded plywood was awesome to work with. I barely sanded, primed, sanded and primed, then painted. Basically, 2 coats of Zinsser Bulls Eye 1-2-3 Primer and 2 coats of cabinet paint.
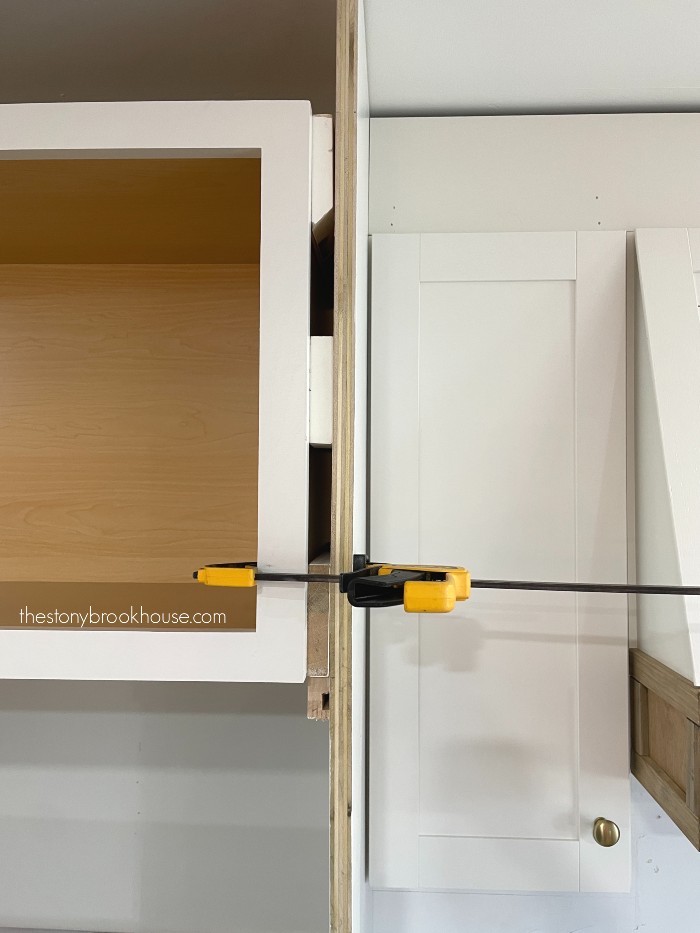
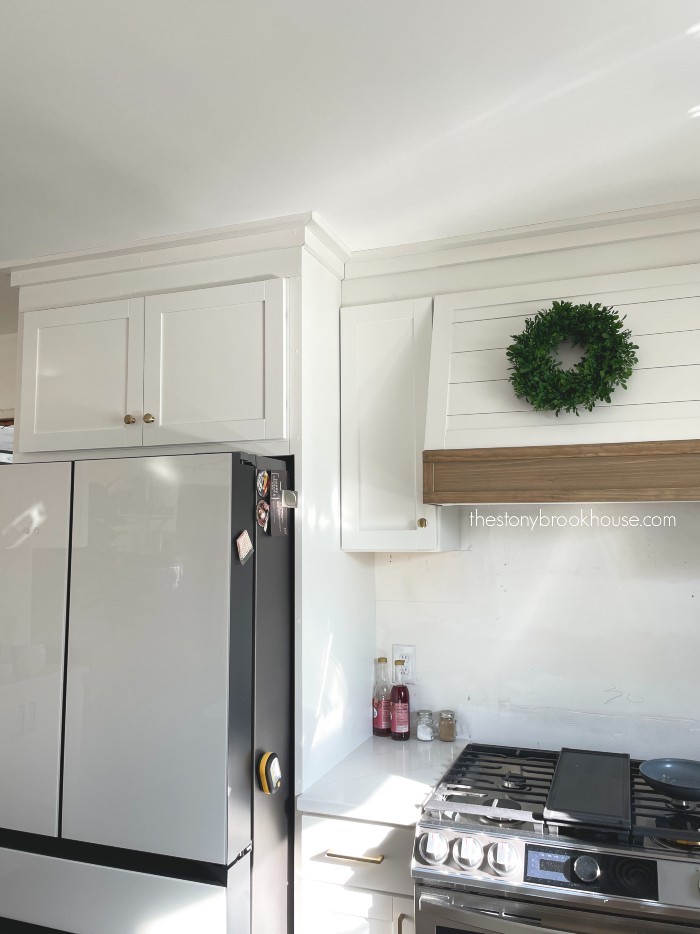
Installing the right side of the fridge enclosure was pretty easy, because it just had to be connected to the existing cabinets. You can see we were able to get the enclosure nice and tight to the cabinet. There was just enough room for the countertop piece to fit.... just barely!
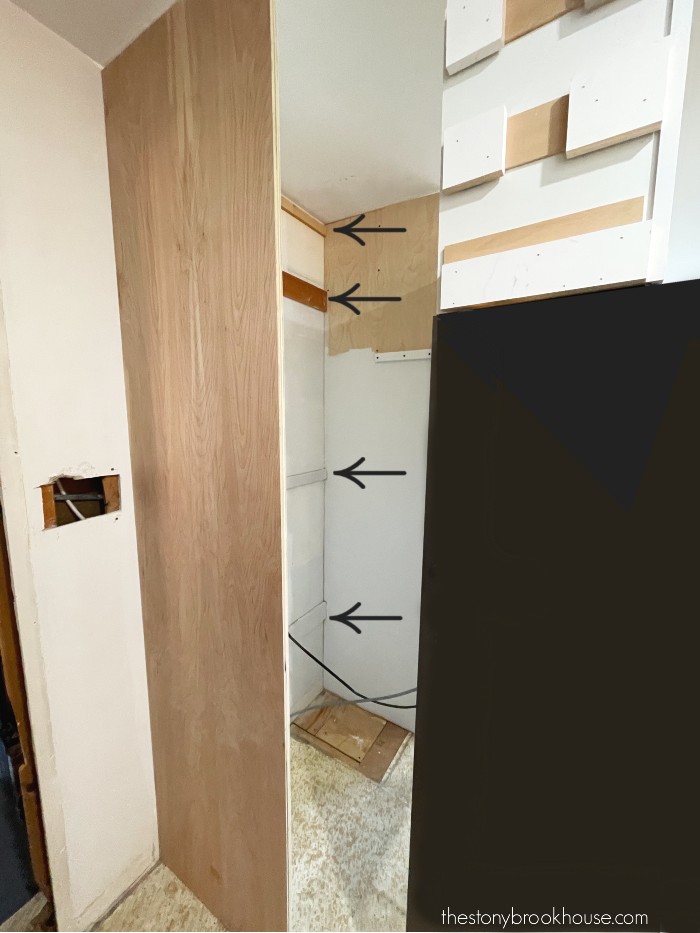
We added supports along the back wall for the other side of the enclosure. I didn't have time to paint the outside of it before installation. We also added spacers to the side of the cabinet.
The cabinet was 36" wide. The refrigerator is 36" wide. Hmmm.... need a little extra to slide that baby in. The spacers worked perfect. It didn't matter what they looked like, they'll be completely hidden.
The fridge cabinet is in place. There are supports underneath on each side and then it is screwed into the plywood on both sides.
You can see the spacers now, but once the face frame is up it will all be hidden. We will add a 1x6 at the top to build it to the ceiling. Then use a 1x2 to frame out the cabinet. That 1x2 will be the full length from the top of the cabinet to the floor, but will be custom cut to just cover the the plywood from the bottom of the cabinet to the floor. We need to make sure that the fridge will fit.
Looking pretty good!
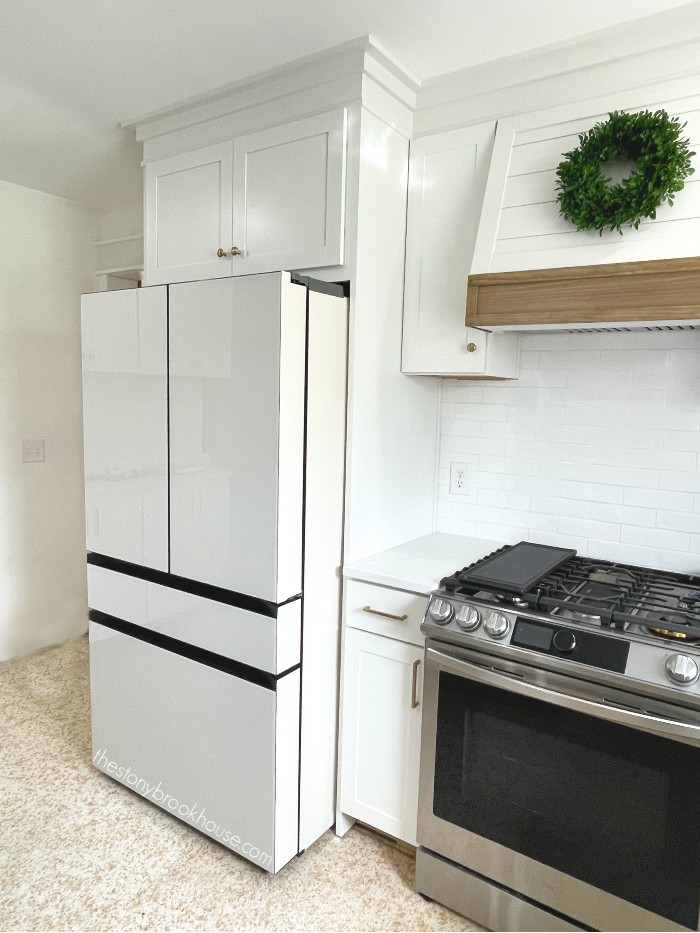
Okay, we added the face frame and crown. If you look closely to the corner where the fridge slides under the cabinet, you can see that the 1x2 is cut to just cover the front of the plywood running down to the floor.
Now, it's time to fill all the nail holes, caulk all the things and give this one more coat of paint!
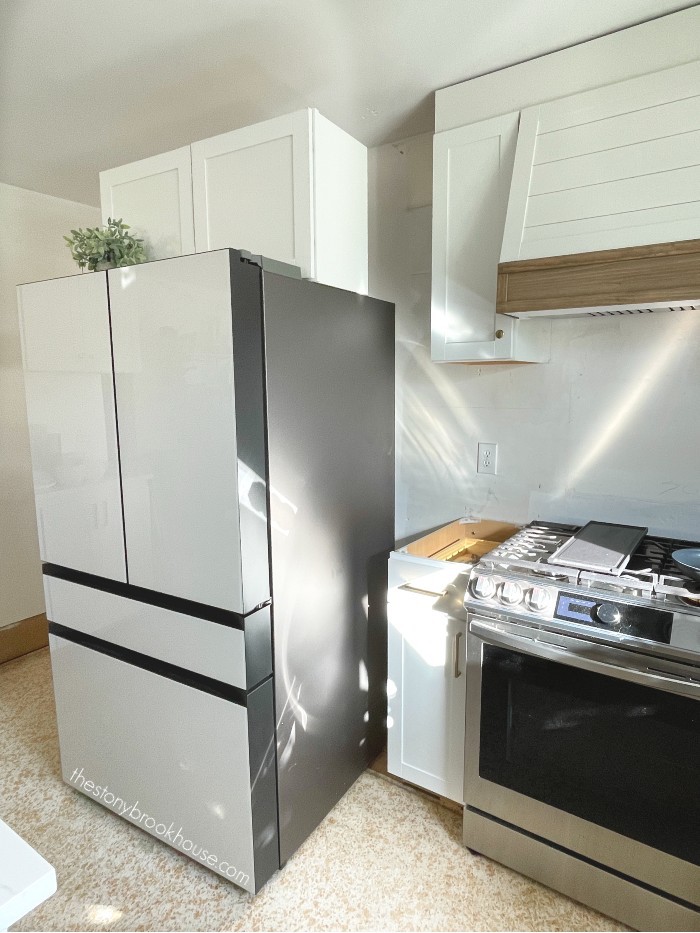
There's one more thing I want to do to really finish the whole thing off. I feel like it's going to make such a difference! Add contact paper to the sides of the fridge. Here's a before...
Here's the after, so much better, right??? This is the peel and stick contact paper I used, Thick Adhesive Vinyl Wall Paper. It is thicker than regular contact paper and has a texture to it. It was really easy to apply and it was repositionable.
Here, I hadn't added the contact paper to the doors yet.
Adding it to the doors makes all the difference!
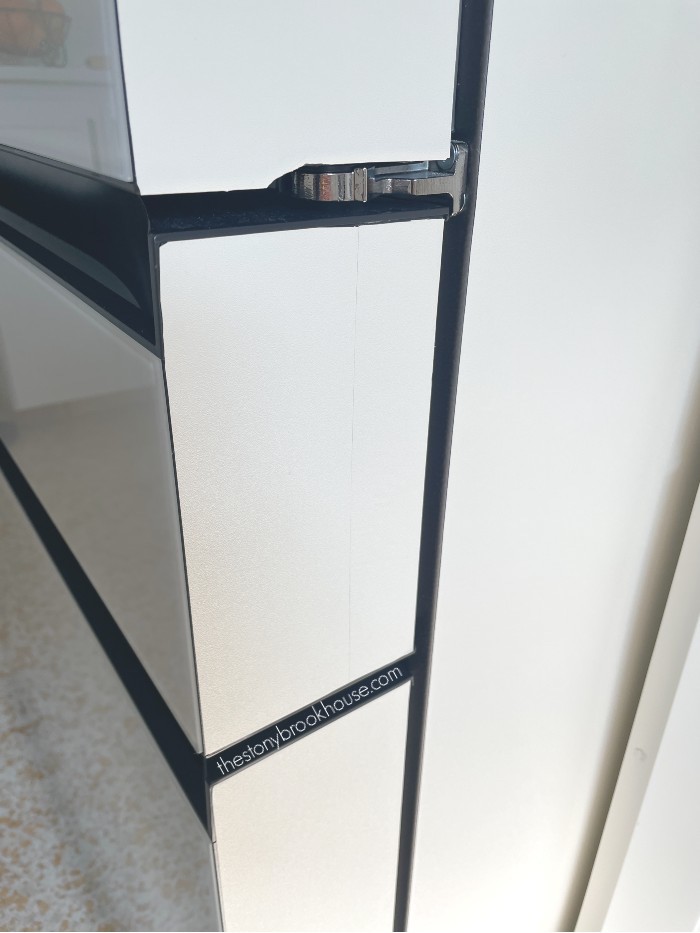
I didn't have enough to fully cover the middle drawer, so I had to piece it together. I figured, I might as well try it. If it looked like crap, I'd just order another roll.
But I think it turned out fine! You have to get really close to see the line where they meet.
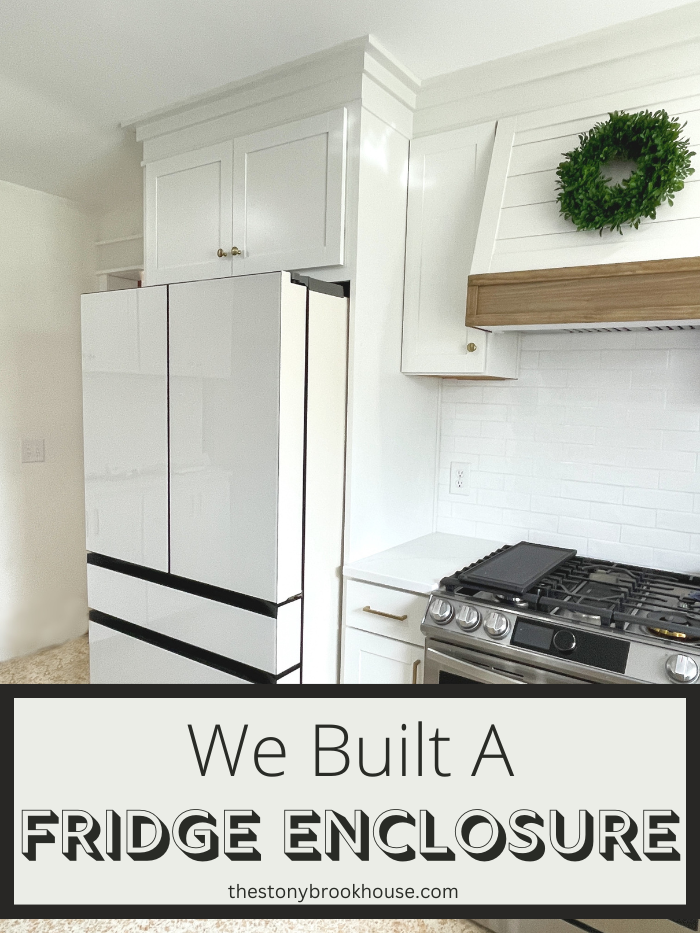
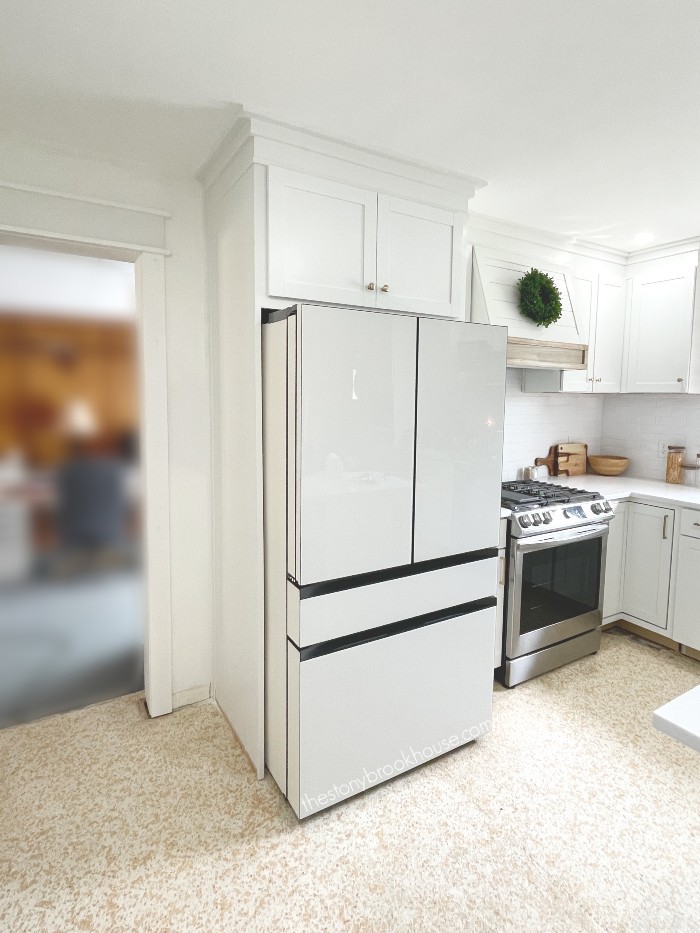
I LOVE the way this whole fridge enclosure turned out! Love, love love!!!
You can even see that we framed out the doorway going into the office/breezeway. It's really coming together!!
Blessing!
Lori
Here's all the start to finish progress we've made in the kitchen!
1960 Kitchen Remodel Plans
Kitchen Cabinets Going In
More Kitchen Demo
Kitchen Update - Ceiling Paint
Building A Shiplap Island
Why I Chose Quartz Counters
Where To Put the Microwave?
Building A Stove Hood
Fridge Enclosure
Kitchen Tile Backsplash
Bakeware Organizer
How We Built All These Drawers
Installing Open Shelves On Tile Walls
Installing LED Undercabinet Lights - No Soldering












This turned out so good! All of these details makes your kitchen look custom!
ReplyDeleteThank you so much! We love it so much! It's a far cry from where we started!!
Delete