It's always so hard to know where to put the microwave... I really don't like over the stove microwave/fan/light things. I also don't like microwaves on the counter. So, I knew that I needed to integrate the microwave into our new kitchen configuration.
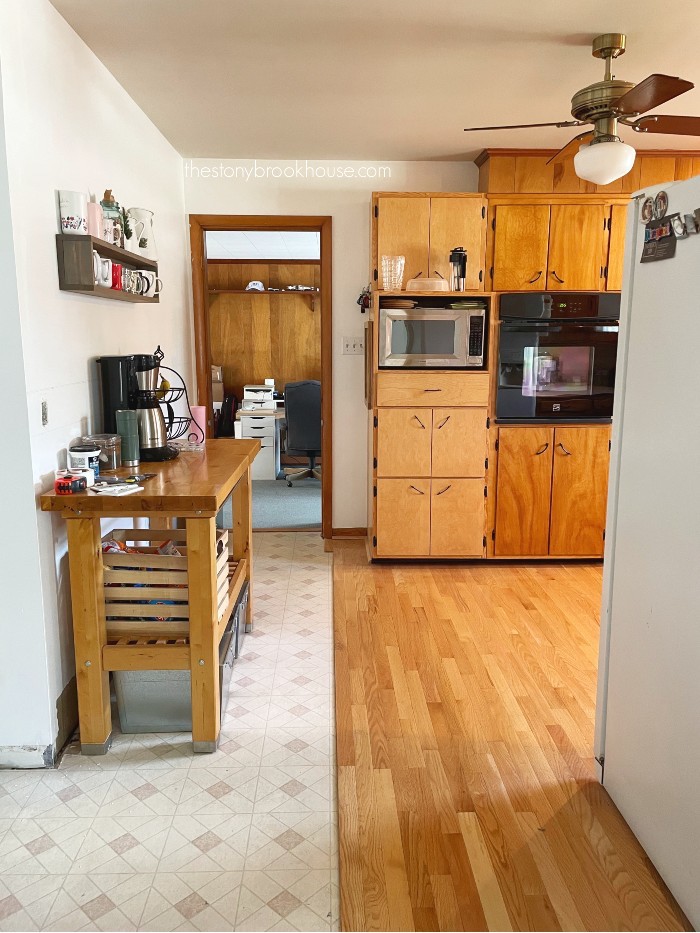
This is where the microwave was in the old kitchen. Wow! We've come a long way, baby!!
I kind liked the fact that it had it's own space in a cabinet. In fact, I loved it enough to 're-create' it in our new kitchen.
So, we had to draw up our own plans for this microwave space. We figured we could build a 'box' for the microwave and set it on top of a base cabinet. Then set a wall cabinet on top of that. Let me show you...
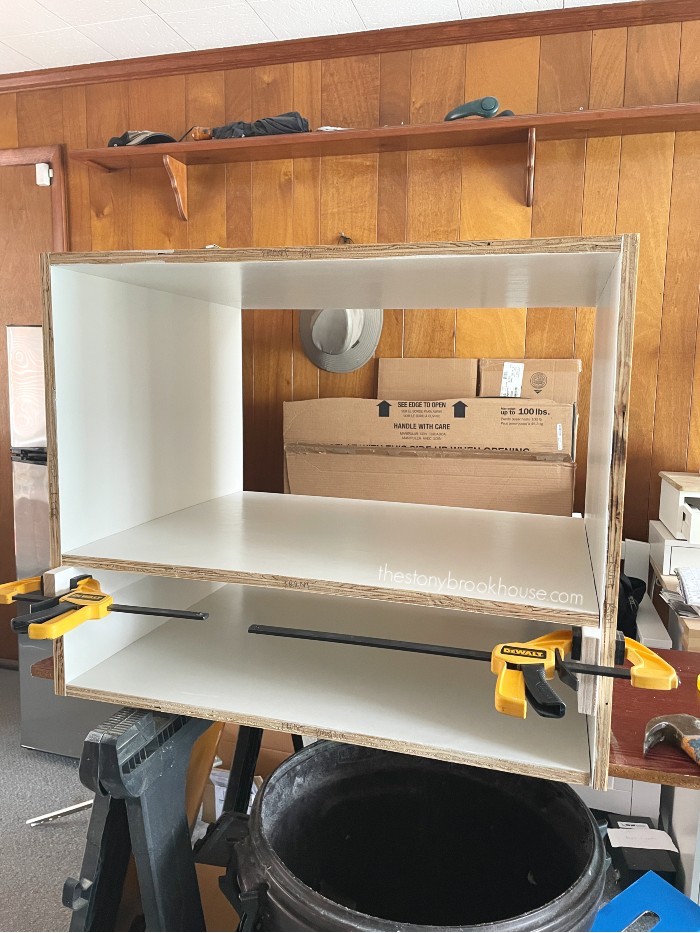
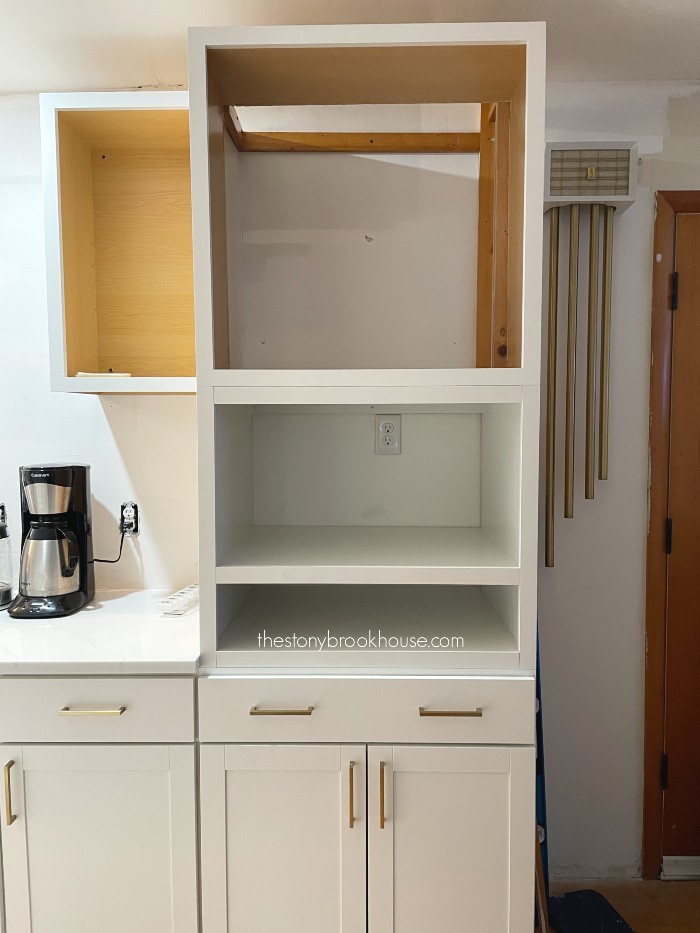
Here is the microwave box we built. We used some pretty cheap plywood to build it. I wouldn't recommend that. I wish I had paid the extra for sanded plywood. It would've saved me the headache of trying to get it nice and smooth. It all worked out in the end, because none of the plywood actually shows.
The top space is for the microwave and the smaller space is for a drawer. (That I still haven't built.) We used 3/4" plywood for this project. You can see that I already sanded, primed and painted the pieces before we put them together.
Then we set it on top of a 30" base cabinet. We used 3/4" boards as supports underneath the box. We screwed the supports to the base cabinet and then screwed the microwave box to the supports from underneath. There is also a support along the back screwed into studs in the wall. This isn't going anywhere! This also raised the box up enough so that the face frame pieces would fit.
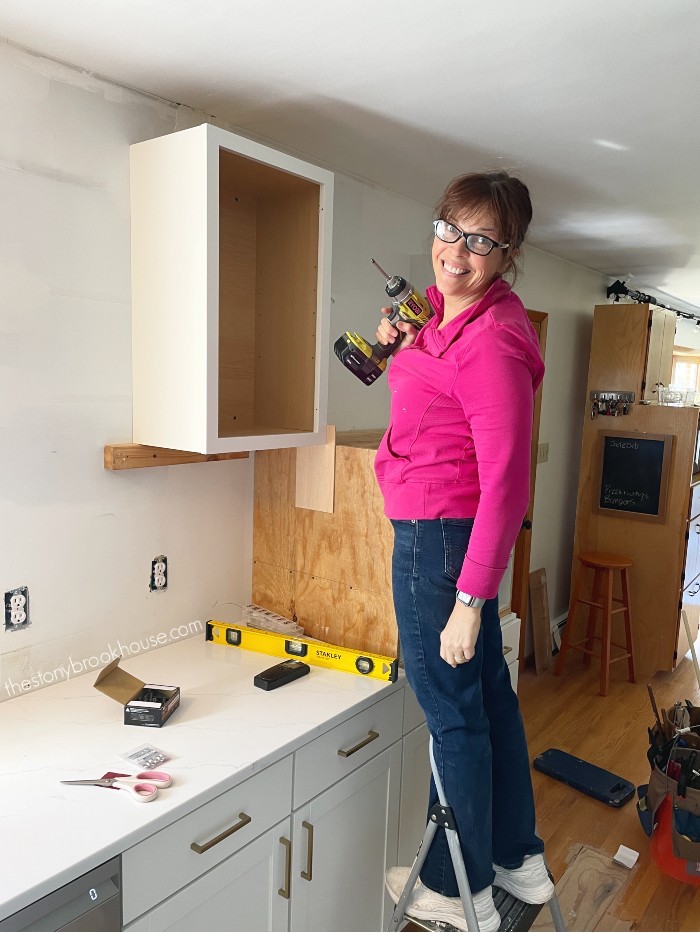
Before we set the wall cabinet on top of the microwave box, we wanted to add the 18" cabinet next to it on the wall. We needed to make sure it was lined up with the correct spacing.
Now you can see how they 'fit' together. Don't worry all of that will be covered with 1/4" underlayment. We made sure that we could slide it between the two cabinets. Do you see the piece of scrap underlayment above?
You also might have noticed, that we blew out the back of the wall cabinet that is sitting on top. There's a reason for that!
The plan is to add slots to that upper cabinet to house baking dishes, cookie sheets, cutting boards or whatever else I can slide in there. I may even make it a double decker one. We'll see.
You can also see how we trimmed out the front of the box with 1x2s. Now, its really starting to take shape!
Wall cabinets are only 12" deep, so we new once we blew out the back we were going to have to build it up again to support the cabinet. All of that 'mismatched business' it getting covered with a full sheet of 1/4" underlayment. It will make it look like one solid cabinet.
We love underlayment! We have used it for so many projects! We just painted it, glued and nailed it up!
Ta Da!
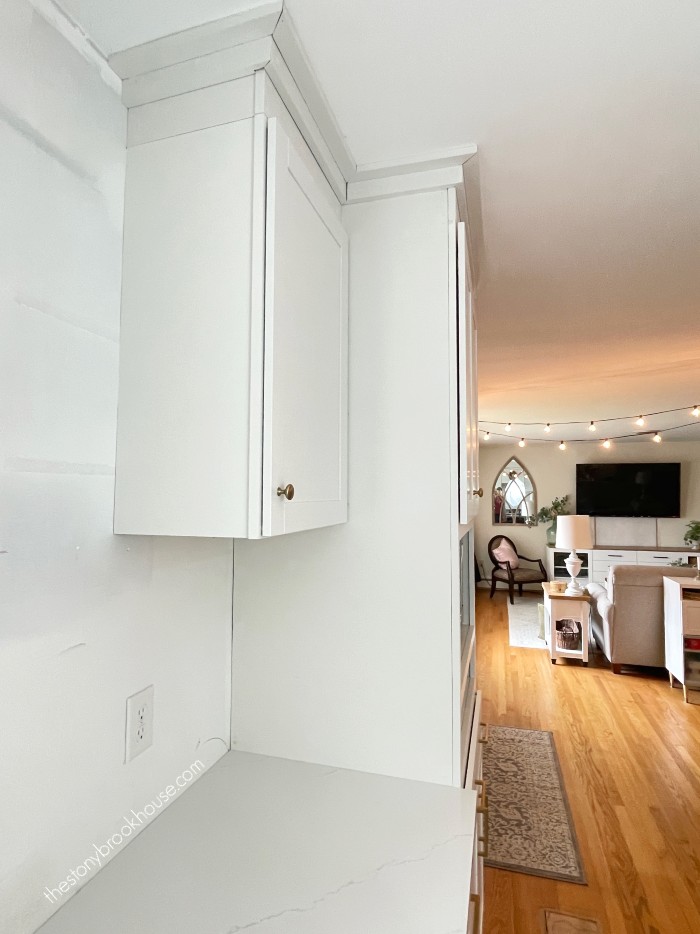
It looks like one solid cabinet!
The last thing left, is to build a drawer. Imagine another drawer in right under the microwave matching the base cabinet drawer.
We also recently added our crown molding. I haven't had time to fill all the nail holes and caulk the seams, but it looks soooo good! I love that we went with something simple.
Blessings,
Lori
Here's all the start to finish progress we've made in the kitchen!
1960 Kitchen Remodel Plans
Kitchen Cabinets Going In
More Kitchen Demo
Kitchen Update - Ceiling Paint
Building A Shiplap Island
Why I Chose Quartz Counters
Where To Put the Microwave?
Building A Stove Hood
Fridge Enclosure
Kitchen Tile Backsplash
Bakeware Organizer
How We Built All These Drawers
Installing Open Shelves On Tile Walls
Installing LED Undercabinet Lights - No Soldering







I think you did a great job!
ReplyDeleteThank you! We love how everything turned out in our kitchen remodel!
DeleteI have an opening like this in the house I’m moving into and don’t know what type of microwave to get to put in it. Any suggestions?
ReplyDeleteGood question! First, measure the space. It has to fit in there. I tried to find the biggest one I could to fit in our space. Hope you find one! I found ours at Sam's Club.
Delete