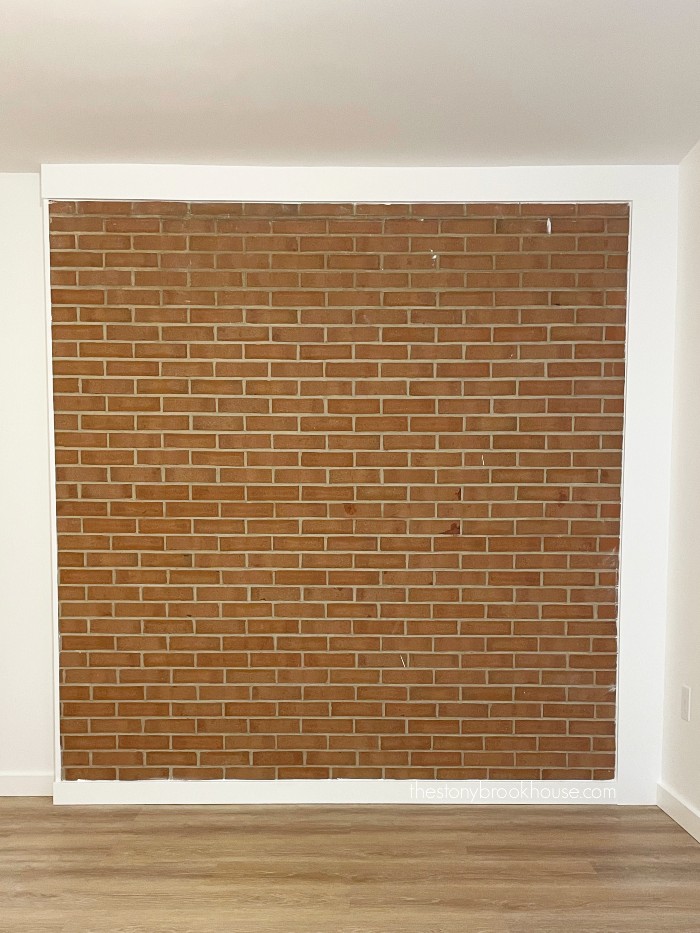
I am so excited about this post! If you've been following me for a bit, you might have remembered when we discovered this brick wall while demoing for our guest room! If not check it out, Guest Room Demo Surprise!
We found this brick wall behind our closet wall. We had no idea that a brick wall was hiding there.
I knew I didn't want to keep the original brick color. It's really not that pretty, it's kind of orangey... and the grout is definitely tan or dirty... It all equaled ugly in my book.
There were a few techniques I was considering for this wall. I could white wash it or completely painting it. But what I really wanted was a German Smear look.
The German Smear look adds so much depth and texture. The only thing I wasn't a fan of is the amount of work and mess it creates to achieve that look. Plus I read, that if you use joint compound to 'smear', it can turn a yellowy color. That is not the look I'm going for.
So, I decided to try and paint it. I've read and seen pictures of it done painted, but hadn't tried it myself. It's always a bit intimidating to try something new, but I figured I had nothing to lose. If I didn't like it, I could always just completely paint it solid white.
I wanted the wall to blend well with my other white walls, so I used my DIY Chalk Paint Recipe. It hasn't failed me yet!
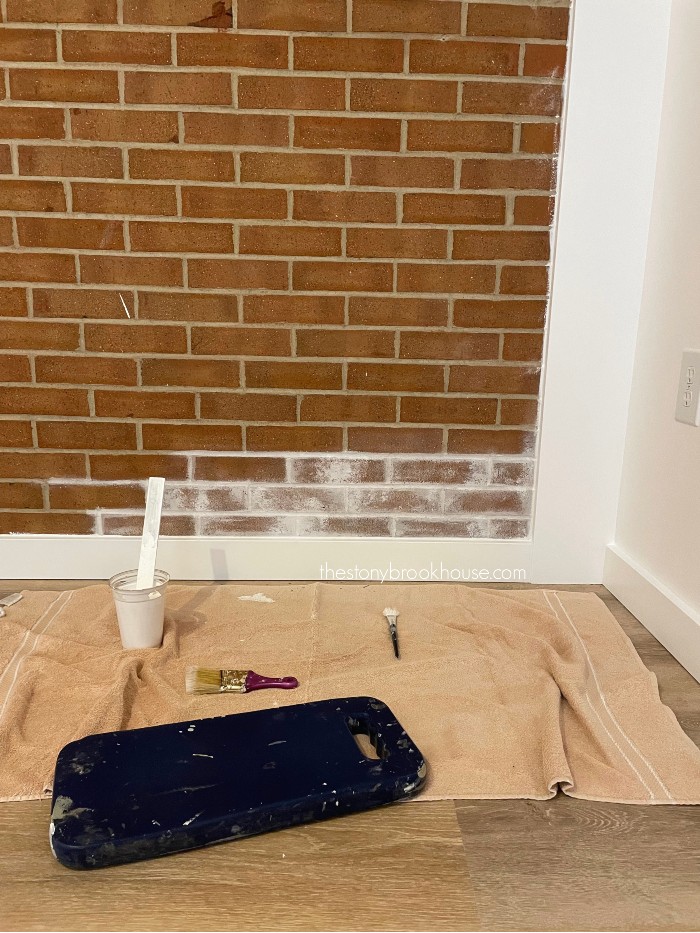
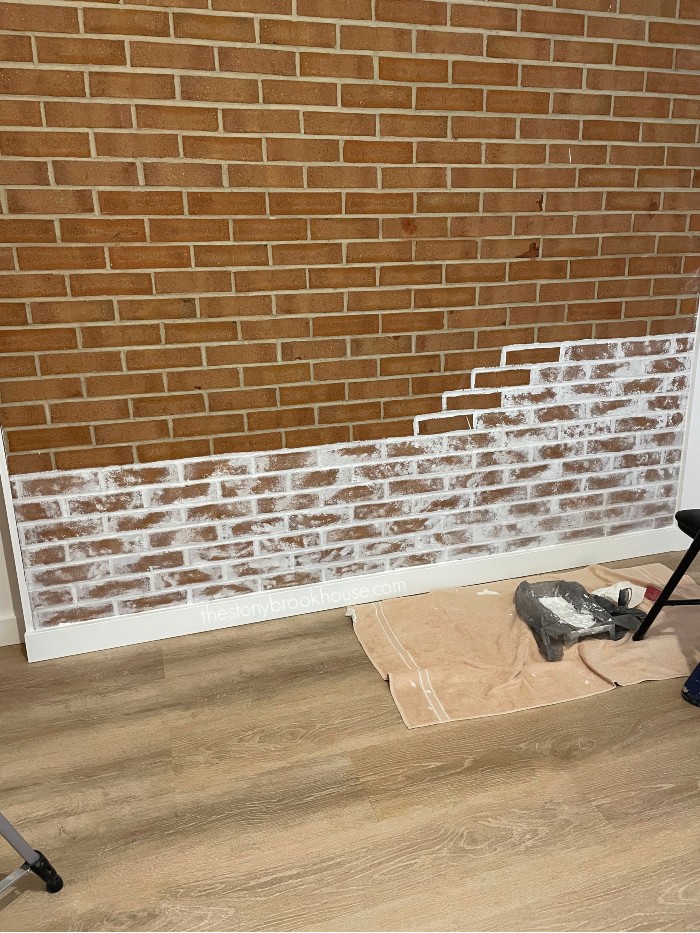
I started in the lower right corner. That seems the best place to start. If I messed up, it would less likely show there.
Okay, here goes... I was slightly terrified and excited at the same time. Something new to try and yet not wanting to screw it up! I wanted this to work so badly!!
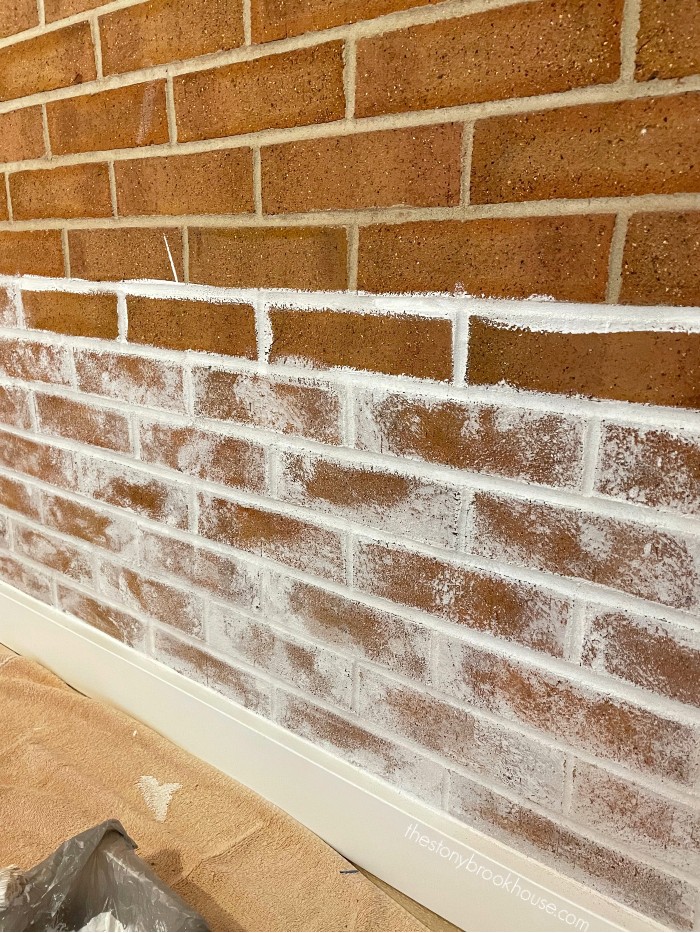
In the photo above, I was brushing the paint on back and forth. It looks too wispy and smooth in my opinion. I want it too look a bit more chunky and splotchy.
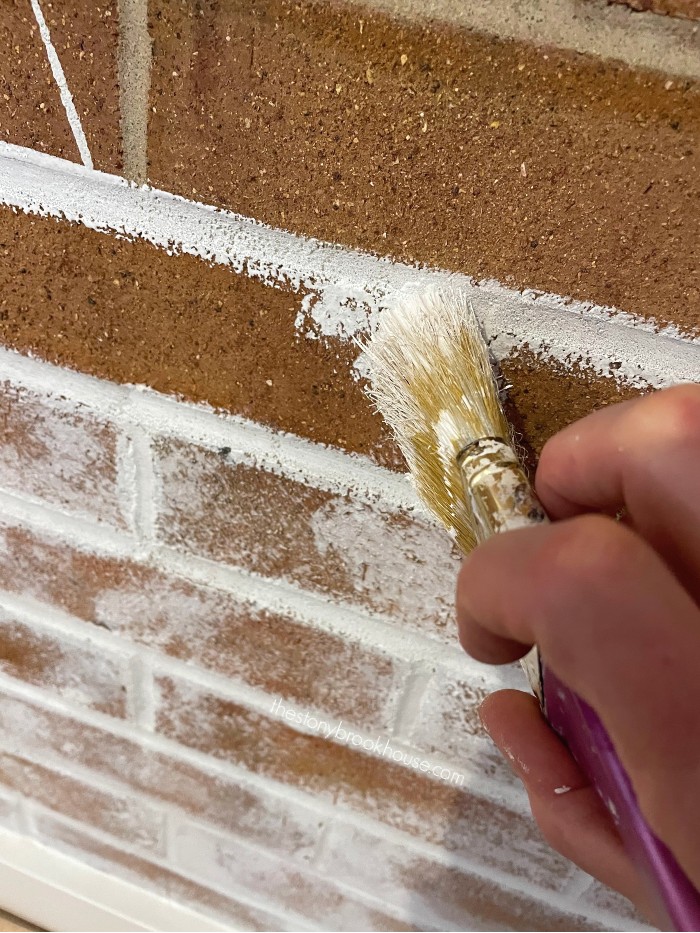
I used 2 paint brushes, the smaller was perfect for the grout lines. It was easier to paint the grout lines first, then go back and add paint to each brick. I used the larger brush for painting the bricks.
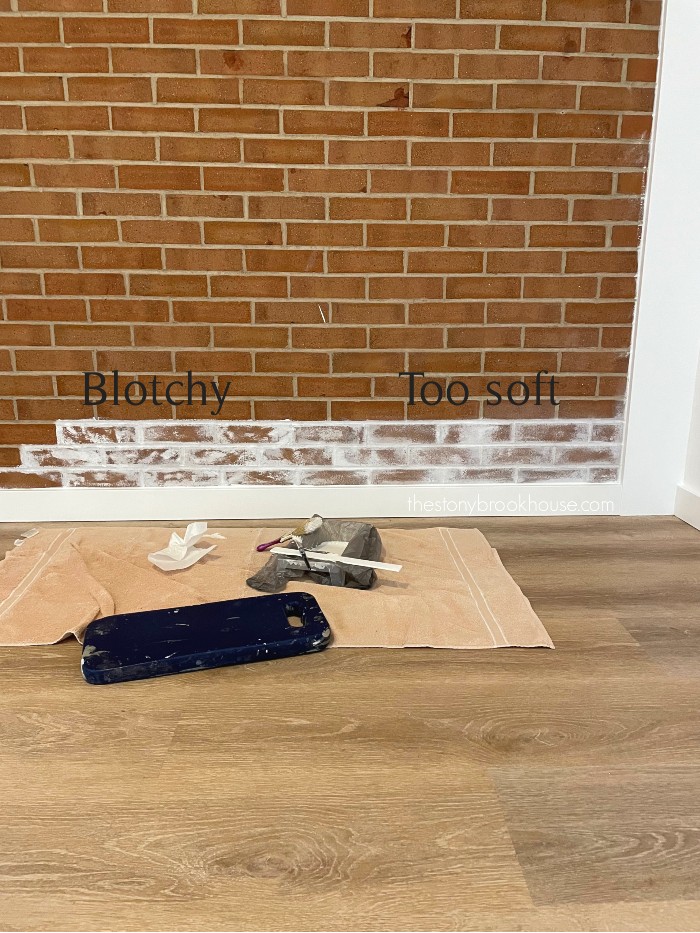
I realized that I need to pounce or stipple the larger paint brush onto the bricks. I would dip my paint brush, then wipe off almost all of the paint and bounce it onto the brick. That gave me more of a blotchy effect. I actually sanded the brick on the soft side and tried to pounce it a bit more.
Trying to find the perfect blend of blotchy and smooth.... The more I did it, the more confident I became.
Finally finding my rhythm painting the Faux German Smear. If you look closely at each brick, I tried to do a different pattern on each one. Because if you do the same thing, it's going to look kinda funny with the same pattern for the whole wall.
Sometimes, I was heavy with paint in the middle, sometimes heavy on the bottom right side, or just the top or half of the brick. I tried to be as random as I could.
It also helps to step back and take a look.
When painting a brick, I would look around it to make sure I'm not doing the same pattern from the previous row. I seriously don't think you can mess this up!
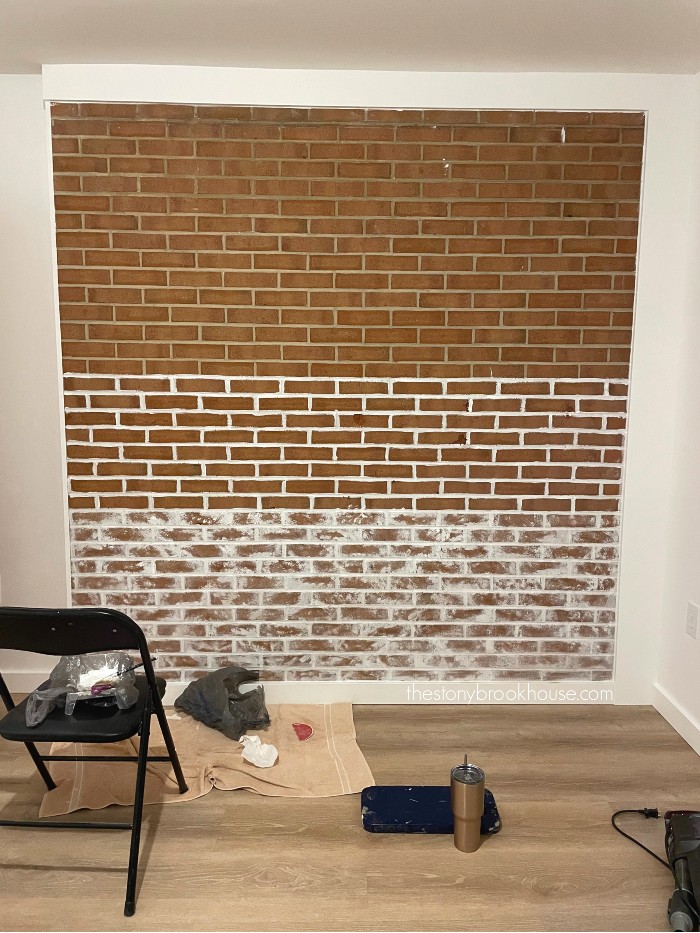
This process takes time... what's wonderful is the paint dries super fast! I really like how it was coming out!
There were some chips in the brick wall from the drywall and closet system that was on this wall. I just packed them with paint and they blended right in. You can't even see them now. What's funny, the paint turned pink on the brush after painting them. It started to absorb the color of the brick. I just wiped the brush off and continued on. I did hit them again later, because I wanted those spots white not pink. 😜
Wow! This is really taking shape! Hubby is really liking it too. Some were skeptical that this would turn out. Hey... I wasn't even sure. But it looks so great!
What a difference! I will say that after it was all said and done, I went over the whole wall with a mostly dry paint brush and just softened everything a bit more. I just love how it turned out!
It was pretty easy! You can't really mess this up. If you don't like an area, you can even sand the brick down a bit. Like I did that in the lower right corner.
Look at that texture! And it's just paint! Love it!!
Blessings,
Lori





Wonderful texture ❣️❣️
ReplyDeleteThank you so much! We just LOVE how it came out!
Delete