Updated 7.16.21
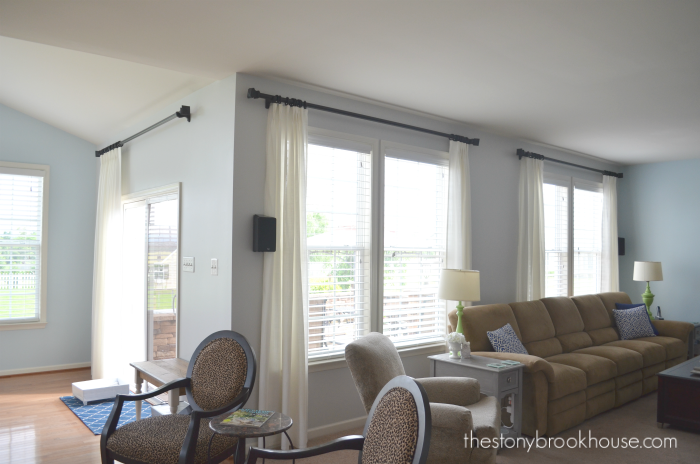
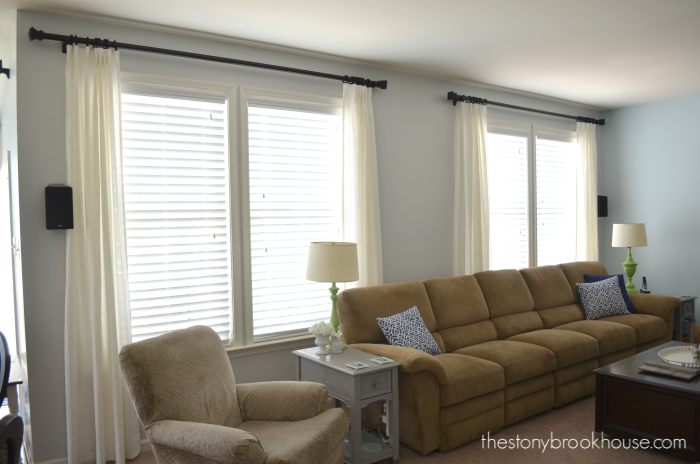
These curtains came out perfect! I've never tried pinch pleats before, but I love how tailored they look!
I will admit that pinch pleating intimidated me at first. I thought it was much harder than it actually is. In fact, I think it's super easy. The most difficult part is deciding on the spacing between each pinch pleat and measuring it all out, after that it's a breeze!
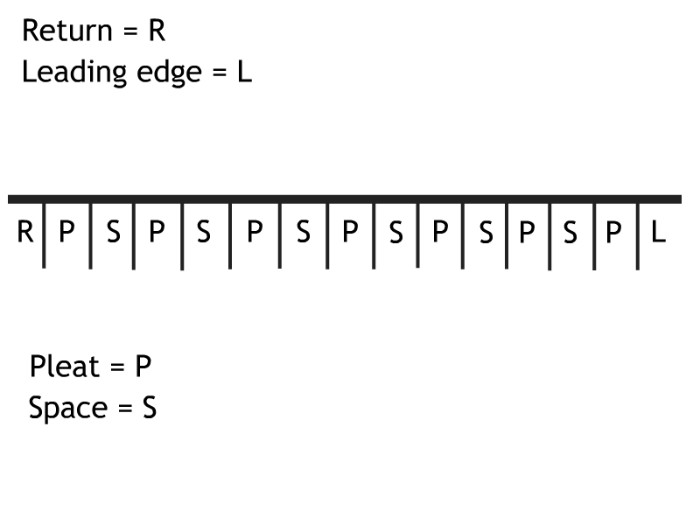
Basically, I started measuring out the pleated part and the space in between each pleat. You also need to include the 'leading edge' and the 'return'. The leading edge is the flat part at the opening of the curtains. The return is at the opposite edge near the curtain bracket.
Let me explain the 'return' a bit more. I had never heard of this term before, but now that I understand it I want all of my curtains to have a return!
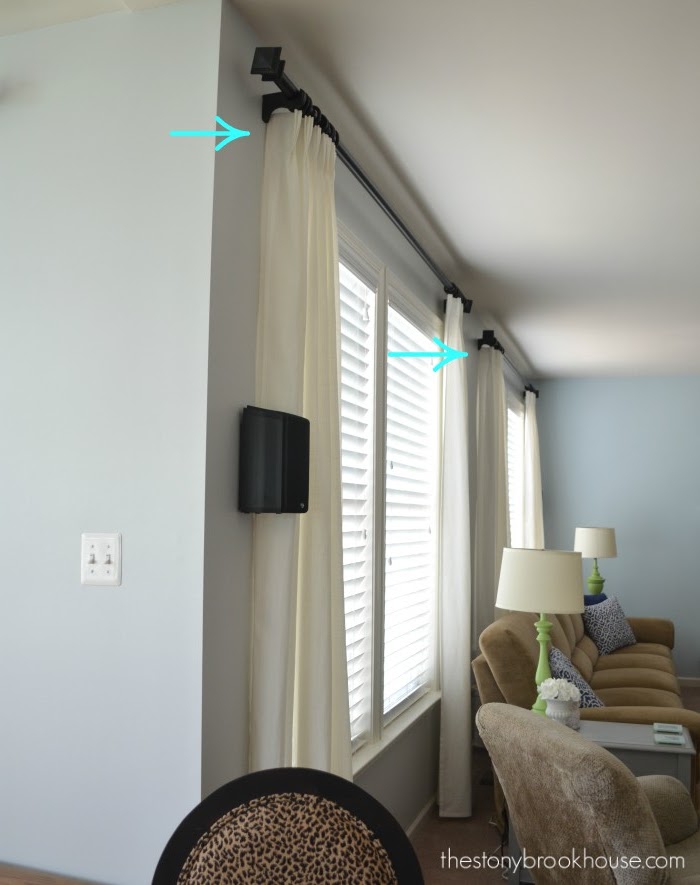
Take a close look at this photo. Do you see those arrows? Do you see how the curtain "returns" to the wall? It hides the edge of the window for a perfect look! Otherwise it would be open and you'd see through to the window. I love this look!
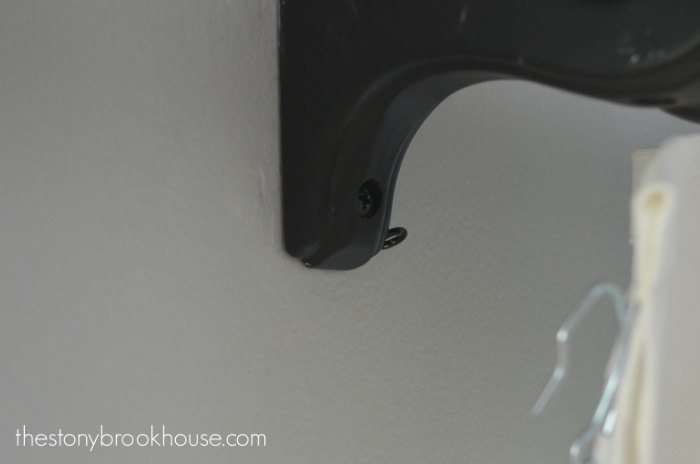
Here's a close up. So, how does it just stay there? I'm here to share the secret with you!
It's a tiny eye screw! I screwed it into the wall where the top of the curtain meets.
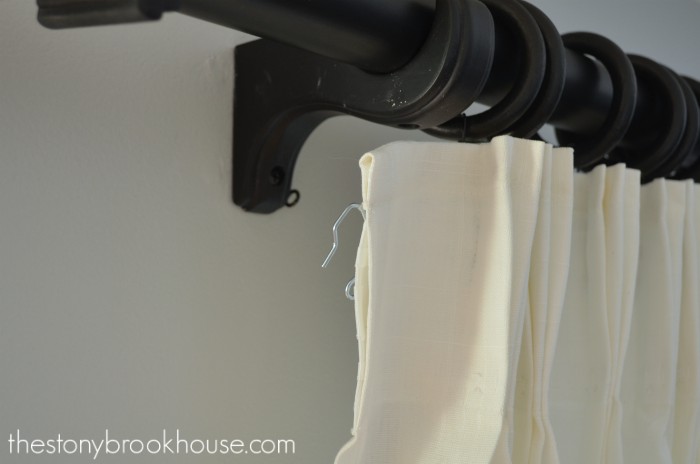
Then you take your curtain hook and hook it right into that eye screw.
And voilé!! Curtain return complete! 😍
Isn't that the coolest thing? I love how polished it looks!
Okay, now that you understand what a curtain return is, back to the pinch pleats!
I had to measure what my curtain return was. Mine was 3 and 1/2 inches. 4 inches is recommended for a leading edge. Then you have to divide the rest of the curtain into spaces and pleats.
Mine looked like this. Pretend that dark line below is the top edge of your curtain. I pinned each pleat and left each space. I had 7 pleats and 6 spaces, plus a leading edge and a return.
Each pleat and space was 4 inches. Well, to be exact it was 3 inches & 15/16ths... that one little hash line before the 4 inch mark. That made them all even.
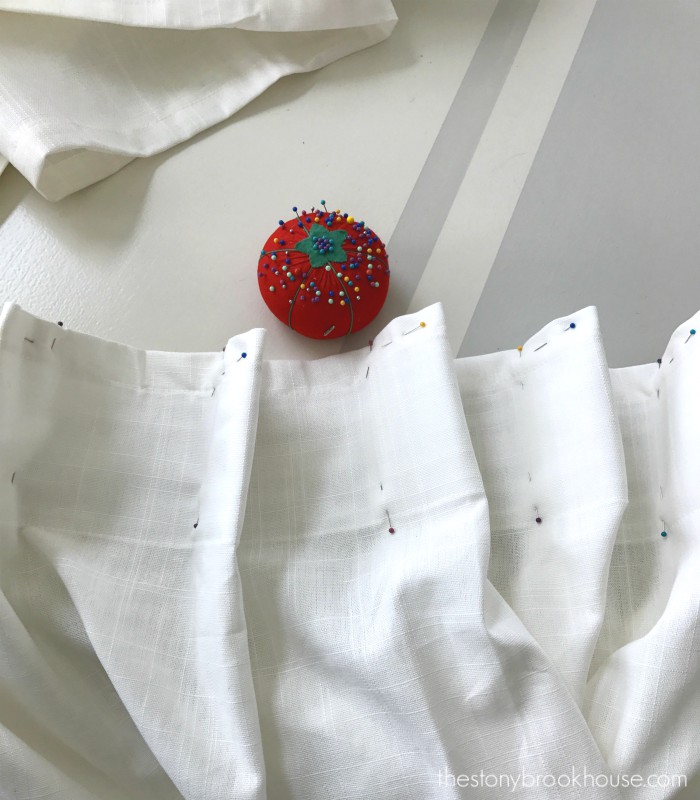
Here it what it looks like all pinned. Then I sewed down each pleat.
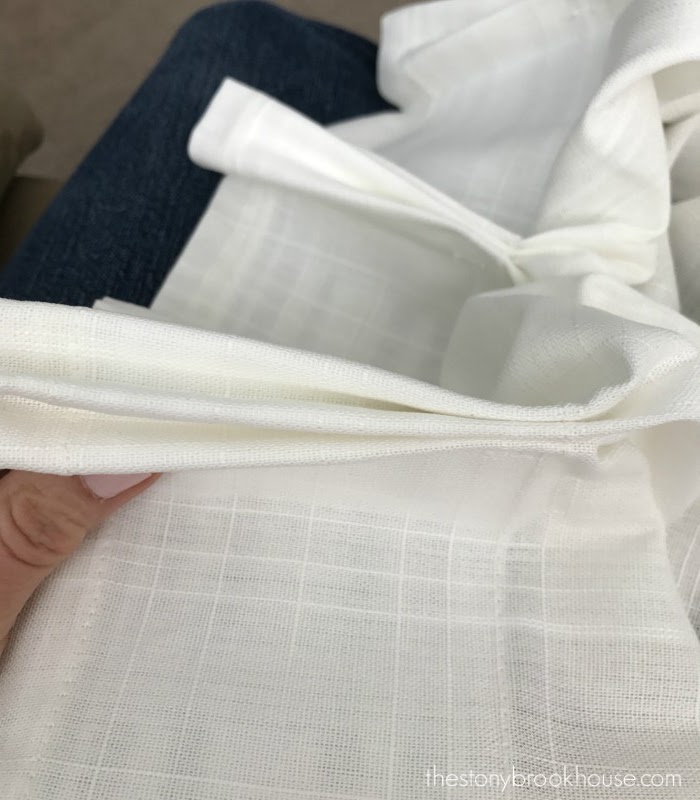
Then within the pleat you form a triple pleat. I took the center of each pleat and kind of pushed it down flat, then drew up the sides to form the triple. Then you sew the base of it to keep it in place.
Isn't that pretty?
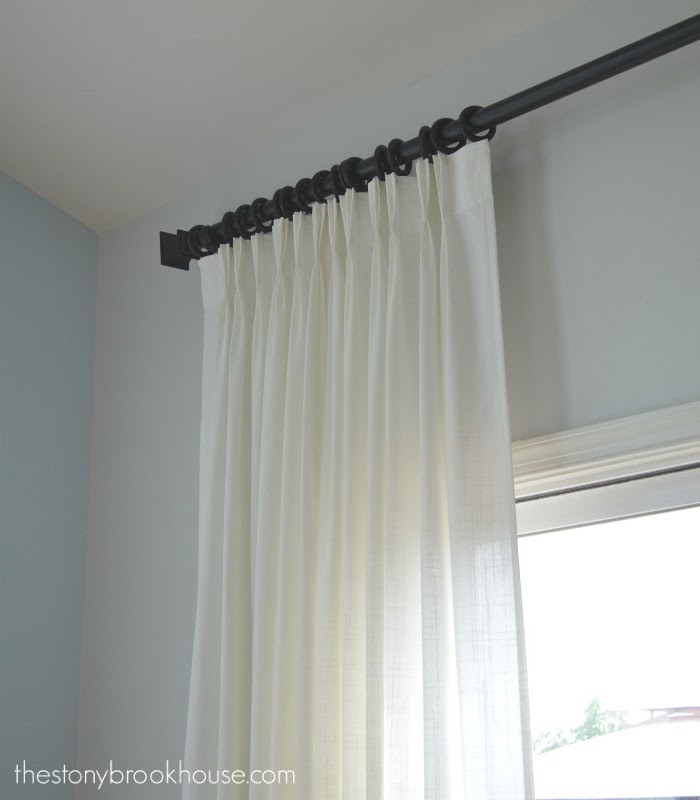
After all they were sewed, I ironed all of the curtains and put curtain hooks at each pleat and hung them on the rings I purchased at IKEA. I really love how they turned out! 💕
There you go beautifully pinch pleated curtains!
Blessings!!
Lori







Excellent post! I love a return on my curtains, too. And you've made making pinch-pleats tackleable! I would never have tried it before.
ReplyDeleteHi Jean! I just love the tailored look! It's so much easier than I thought! Thanks for stopping by!
DeleteHello Lori,
ReplyDeleteYour curtains turned out great! I'm pretty sure I know what the return is but the photos just wouldn't come up for me ~ we don't have the best internet connection here where we live. Years ago as a still newlywed, I made a 6' pinch pleated curtain for over our sliding glass door aboard Camp Pendleton, California. I forget how many feet exactly of fabric I used sewn together sideways in 6' sections, but it was a good 12' to 15' or so of fabric spread across an entire living room. Like you, once I laid down pleaters' tape across the top of my header, sewed that in, then sewed each pleat, the curtain turned out great.
Your readers may not know about "pleater's tape" but its a heavy pellon fabric bought from a box of continuous pleating fabric (about 5"+/- wide) that is labeled just where to create the folds, sew, etc. It's great stuff if anyone ever decides to take fabric they have and make curtains.
Another trick is to put "fabric weights" (nothing more than stainless steel washers which can be purchased from a hardware store) in the bottom of the lower hem. These keep the hem hanging strait down and keep it taught. Place them about every foot or so and sew into the seam. Thought I'd throw that out there for folks newer to sewing. :) Wish I could see more of your photographs.
Great post!
Barb :)
Great tips, Barbara! I'm so glad you shared them! I forgot about pleater tape. The drapes I purchased already had some sort of "tape" in them. The weights are genius! How funny my hubby and I are originally from California. So glad you stopped by! Thanks for reading. :)
DeleteDid you start with ready-made drapes?
ReplyDeleteYes! These were Ritva curtains that I purchased at IKEA. But you could definitely do this same technique if you made the curtains yourself!
DeleteThese perfect pinch pleat curtains are exactly what I've been looking for! They add such a classy touch to any room and the pinch pleat design gives them a tailored look that's hard to beat. Plus, they're super easy to hang and adjust. Definitely a must-have for anyone looking to upgrade their home decor.
ReplyDeleteYes! I've come to love the classic look of pinch pleat curtains and have them all over our home. Thank you for your sweet comment and for stopping by!
Delete
ReplyDeleteThis blog is incredibly helpful! The step-by-step guide on making pinch pleat curtains with a return is clear and practical. The tips and techniques shared make it easy for both beginners and experienced DIYers to achieve professional results. Thanks for the detailed insights!
Thank you!
DeleteGreat guide! The step-by-step instructions make it so much easier to understand how to create beautiful pinch pleat curtains with a return. I’m definitely going to try this for my next DIY project!
ReplyDelete