

I realize, now that I'm actually writing this post, that there is no way I can get through the entire transformation.... It's going to have to be in 2 parts, otherwise this is going to be one super long post.
I probably should have written as we've gone through the transformation, but I wanted to 'finish' the main wall.... Which (of course) one thing lead to another... then another... and before you know it I'm several projects behind writing for the blog... 😩
So let's get on with it... 2013... 6 years ago... we had been living in our new home for about 4 years and this is as far as I got decorating wise. Our style then was pretty dark.... was it a style??

When my daughter came home for Christmas break 2013, she had a brilliant idea about rearranging our living room furniture. I wrote all about it here.
Wow! It just opened the living room up!

I think the rearrangement started something in me to look at the living room differently. It prompted some painting...

In 2014, I did more painting... furniture, shelves, lamps. Hung some light curtains. Then it pretty much stayed like this for 5 years.
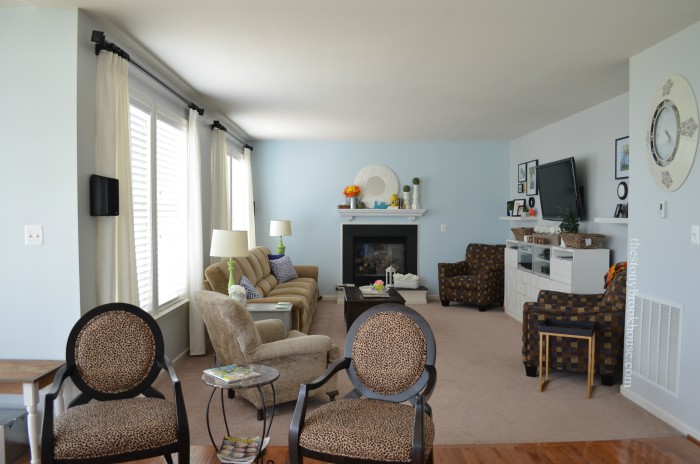
After changing our bedroom, powder room, and laundry room, we couldn't leave this living room like this anymore. Hubby and I decided it was time for a change... a MAJOR change!
We did some more rearranging just to make sure we could live with it, you know to test it out.
So you'll notice in the next photo, we flipped the couch to the opposite wall, and moved the TV to the side. (We were considering mounting it above the fireplace).
We also split up the entertainment center. We purchase the BESTÅ set from IKEA back in 2012. That thing has been through a lot!! Remember it used to be dark brown before it's transformation. I have a post on that too! BESTÅ Makeover. And just wait they will be getting another makeover... 😍

Let me just say, that after we flipped the couch... hubby and I LOVED it! 💗 We couldn't believe how much we enjoyed looking out the windows and everything just seem brighter and happier! We knew we couldn't put the couch back on the other wall again.
We figured starting with the fireplace wall would get the ball rolling.... but should we keep the hearth or not? We struggled with that decision. We weren't sure what was involved. Would it be too much work? Would it get above our skill set? Hmmmm....
Well, we knew we really didn't love it, even though we chose to it, when we built the house. But after living with it... it just took up too much precious real estate in our living room. So, Hubby decided to go for it! Demo Day!🙌

We had no idea what we were getting into...

Come to find out, they built it kinda strange, the support structure was interesting... we were trying to save the slate, because we wanted to reuse it at the base of the fireplace. Praying and hoping it wouldn't break.... it didn't. 😊
Then we had this hole...

Hubby figured it out. He built up the support of the fireplace and fitted some drywall in the space. We were hoping to cut the slate and finish the surround with it. We just didn't know if we could cut it ourselves. More on that in Part 2.
I really wanted to shiplap the wall. I though it would be nice touch for a focus wall. In doing shiplap in the past, I discovered that if your wall isn't white or close to the shiplap color, you will see it between the shiplap strips. So, instead of painting the entire wall, I just painted stripes where the shiplap would meet. I didn't want blue showing through. Just feeling lazy...😜

For shiplap, we always use underlayment. We purchase a 4x8 sheet at Home Depot for about $15. (FYI... They will cut it for you, Lowes won't.) We chose to cut it ourselves, into 6 inch strips.
It's pretty easy to put up. I located the studs on the wall and marked them. Then just started nailing it up. Using nickels as a spacer between strips. I left a gap at the top because I will be installing crown molding there.
Also, I wanted the shiplap to look continuous and not staggered. Thankfully the wall is 15ft wide, so I had each 8ft strip meet in the middle. That's where the TV will be, so it will look like the shiplap is one continuous board. 😊

I stopped here at the top of the fireplace, because we needed to figure out what we were going to do regarding the 'surround' of the fireplace. We knew we wanted something there... columns on the sides, of course a mantel....
Next up, Part 2... What did we do for columns? What about the slate? What I learned about primer. How about putting the TV on the wall? All that and more!
Come to find out, they built it kinda strange, the support structure was interesting... we were trying to save the slate, because we wanted to reuse it at the base of the fireplace. Praying and hoping it wouldn't break.... it didn't. 😊
Then we had this hole...
Hubby figured it out. He built up the support of the fireplace and fitted some drywall in the space. We were hoping to cut the slate and finish the surround with it. We just didn't know if we could cut it ourselves. More on that in Part 2.
I really wanted to shiplap the wall. I though it would be nice touch for a focus wall. In doing shiplap in the past, I discovered that if your wall isn't white or close to the shiplap color, you will see it between the shiplap strips. So, instead of painting the entire wall, I just painted stripes where the shiplap would meet. I didn't want blue showing through. Just feeling lazy...😜
For shiplap, we always use underlayment. We purchase a 4x8 sheet at Home Depot for about $15. (FYI... They will cut it for you, Lowes won't.) We chose to cut it ourselves, into 6 inch strips.
It's pretty easy to put up. I located the studs on the wall and marked them. Then just started nailing it up. Using nickels as a spacer between strips. I left a gap at the top because I will be installing crown molding there.
Also, I wanted the shiplap to look continuous and not staggered. Thankfully the wall is 15ft wide, so I had each 8ft strip meet in the middle. That's where the TV will be, so it will look like the shiplap is one continuous board. 😊
I stopped here at the top of the fireplace, because we needed to figure out what we were going to do regarding the 'surround' of the fireplace. We knew we wanted something there... columns on the sides, of course a mantel....
Next up, Part 2... What did we do for columns? What about the slate? What I learned about primer. How about putting the TV on the wall? All that and more!
Blessings!

No comments
Post a Comment
Comments are awesome! Let me know what you think!