*This post contains some affiliate links. Please see my full Disclosure Statement.
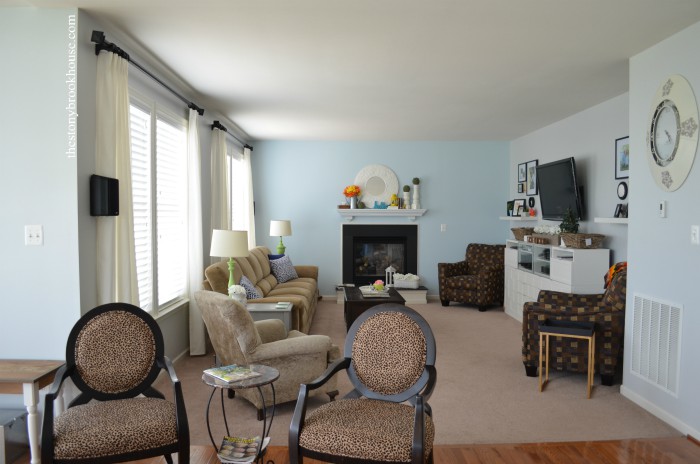
When hubby and I decided to tear into the living room, we KNEW that carpet was gonna have to GO!
I'm of the opinion now, that I want all carpet gone. I can't stand it!
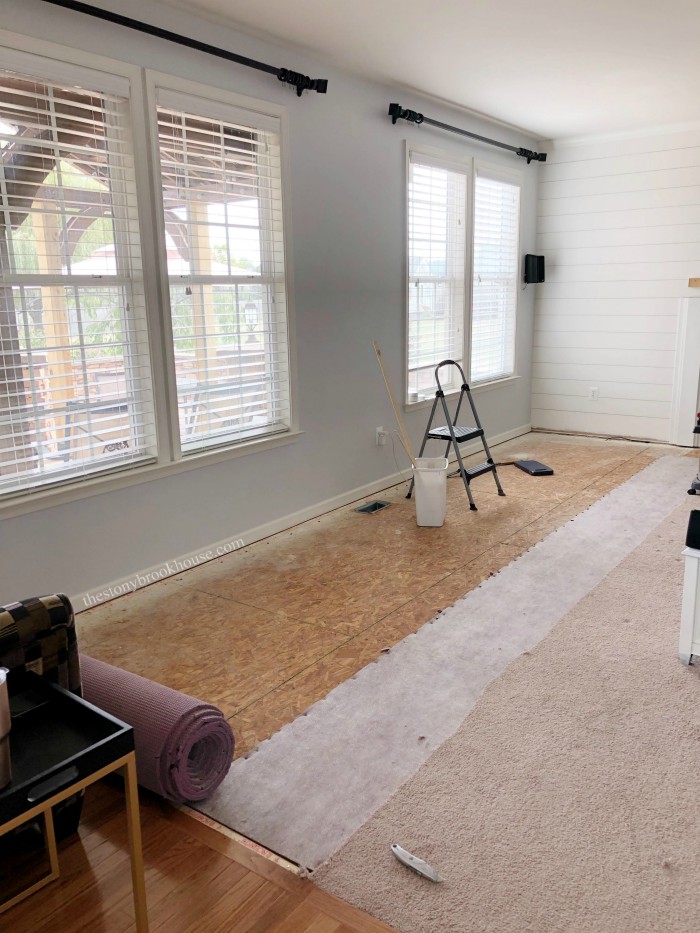
There were so many happy joy joy feelings when I took the knife to that carpet. I couldn't wait to haul it out to the curb.
I just cut it into sections, rolled it up and carried it out.
Next, the padding. We paid extra for this premium padding. It was still in great shape so, we decided to keep it. We might put it under the big rug we'll be getting for the living room, just a little more comfort under our feet.
Anywhooos.... the flooring. We looked at all sorts of options... but in the end it came down to price. We didn't want to fork out a chunk of change to put in a new floor.
Where do you go for inspiration?? Probably the same place I go! Pinterest! (You can click on this link and follow me there. 😊) So, I came across this concept of using plywood for flooring... What?!?! I know what your thinking... Plywood, it's such an ugly wood and it's so cheap. Your floor is going to look like a subfloor.
Well, it can be ugly and it is super cheap! But I can tell you, it definitely doesn't look like subfloor!
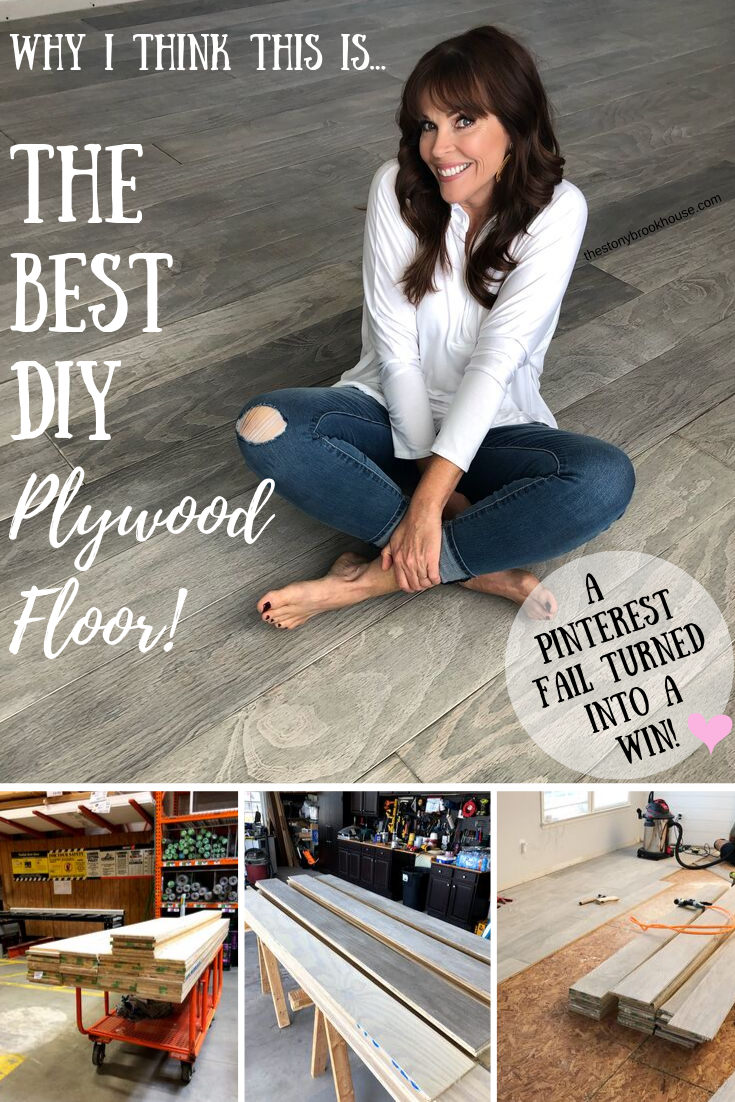
I read so many blogs trying to find the best way to lay this floor and while also trying to find the look we wanted. So, I took some info from here and a little bit from there and this is how we ended up....The Best DIY Plywood Floor!
The reason I call this 'The Best DIY Plywood Floor', is because...
- We spent very little time on our knees. (HUGE Win!! Especially for us 50+ers)
- The process was very easy and virtually no mess!
- Hardly any fumes or odor.
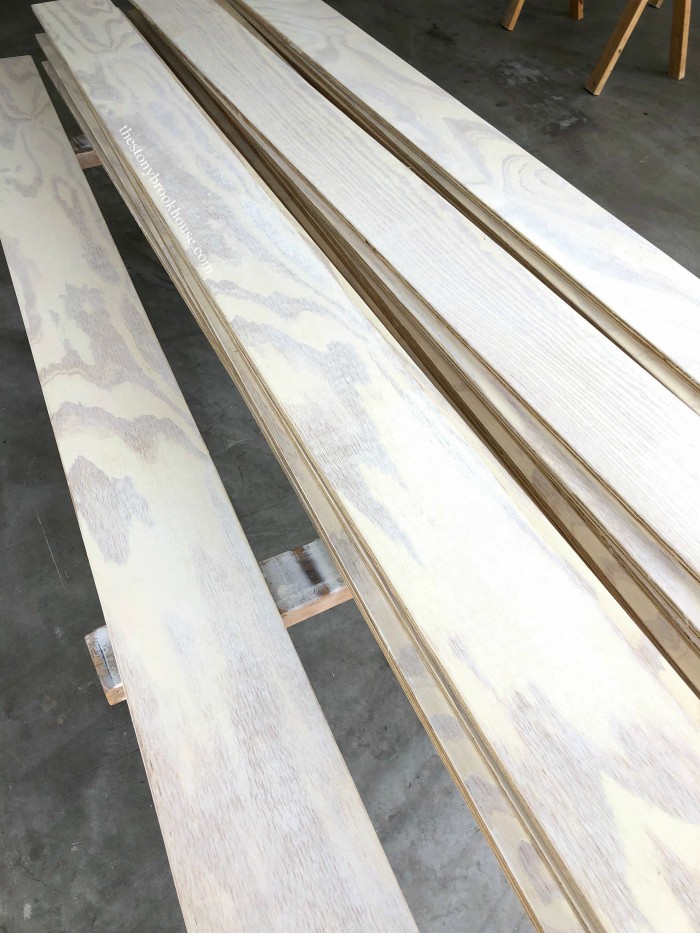
Here's the process.... we picked out plywood at Home Depot that was very close to the thickness of our hardwoods, so that there was hardly any transition between the two floors. Ours was about 1/2" thick.
Our room is 15'X20' = 300 sq. ft. Each sheet of plywood is 4'X8' = 32 sq. ft. We needed 10 sheets = 320 sq. ft.
Home Depot cut each sheet in to 8" planks, which gave us 6 planks for each sheet, totaling to 60 planks.
Each sheet cost us around $24, so the wood cost us around $250. Not bad... We did end up paying $14.50 for all of the cuts, but well worth the money! Time is money!
We brought them home and got to work. We had a good system. Hubby unloaded, lightly beveled all four sides of the plank with our new Dewalt Orbital Sander and then we laid them out for me to paint.
This is where 'the Pinterest fail' began... We had wanted the floors to look a bit white washed, with some of the grain showing. We planned on sanding them after the ' paint washing'. Well, after one coat... they looked a bit yellow. Yellow? What? I followed the paint wash recipe, 1 part primer with 2 to 3 parts water. I used about 2 1/2 parts water. Zinnser Bullseye 123 is the best primer!
Well, let's try a second coat... nope. Still yellow. This stinks! We did NOT want yellow and white floors. Seriously?!?! Ugh! What now? The wood's bought, cut and it's going down one way or another!!
Back to Pinterest! There's gotta be a way to save this, besides painting the boards solid white. I really didn't want white floors... So, I searched and found this gray look... hmmmm...
But first, all the boards needed to be sanded. Whenever wood is painted is soaks up the paint and raises the grain. I am sooooo glad we invested in a new Dewalt 5" orbital sander. That thing is the bomb! Incredible power and ease of use, but the real bonus was the dust collector. There was so little sawdust on the boards. That made my day!
On Pinterest, I found what they called a Poorman's stain. I've never heard of this before. It's a mixture of approximately 2 cups of mineral spirits with 3-4 tsp. of Rustoleum black enamel satin paint. Well, I had both on hand, this was definitely worth a shot! (Update 6.22.20 - I've been asked several times what type of enamel paint I used. I've linked it now. The link is for a very small can. I picked mine up at Lowes.)
I played with the ratio a bit working with my soup can and paint stick.... soooo professional! 😜 This looks pretty good!
Hubs gave me the thumbs up and so I went for it! I probably made a total of 5 soup cans of the stuff for all 60 boards. It went on super easy, just used a 2" brush.
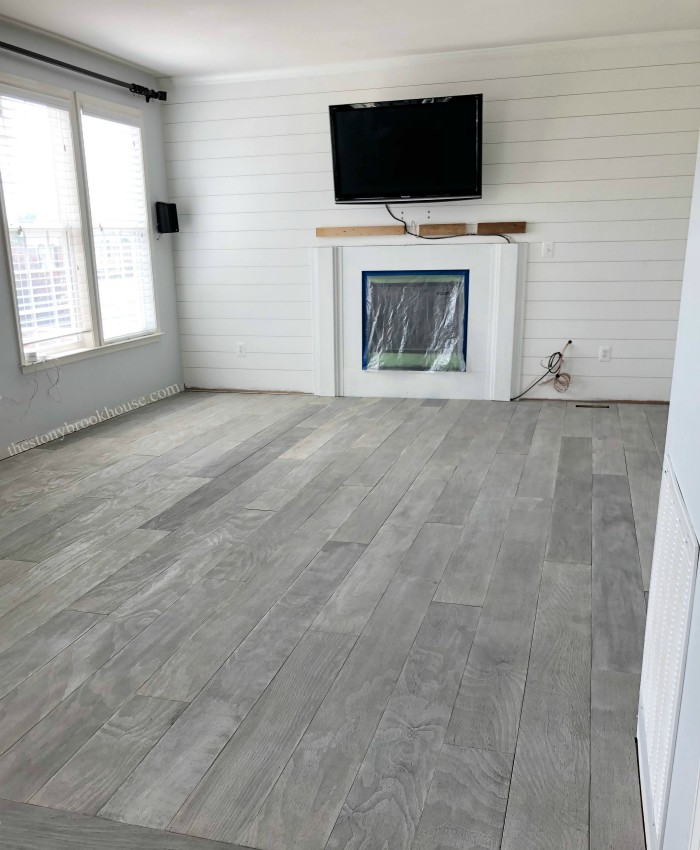
We could not be happier!! That Poorman's stain was definitely what made this DIY project a WIN!!
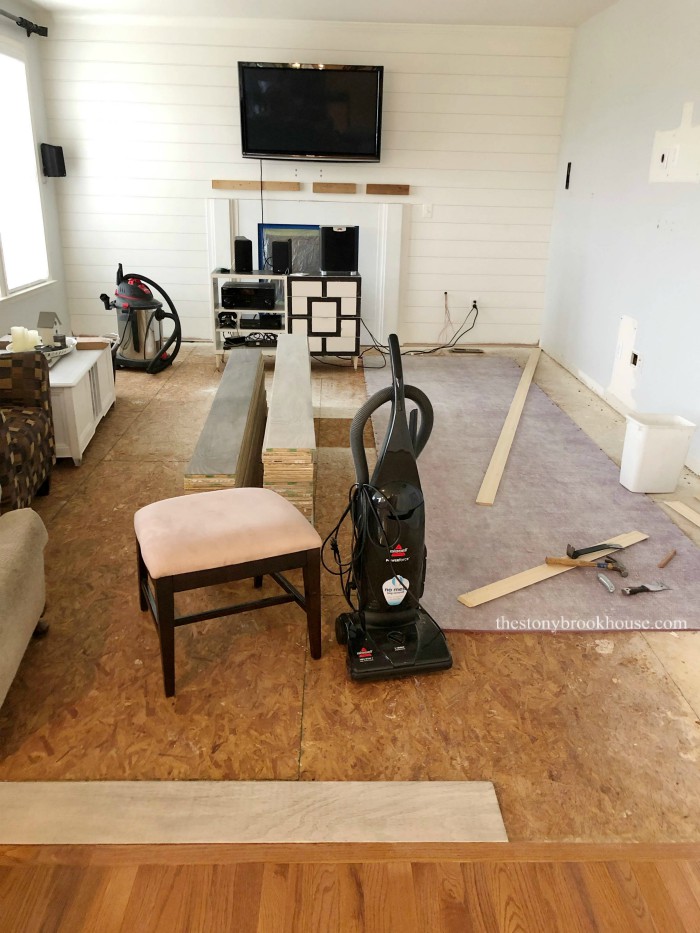
After they were all stained, it was time for installation. We snapped a chalk off of one of the walls, hoping to keep things square. Plugged in the air compressor and were ready to roll.
The transition board was the first one we put in. It was just a hair thinner that our hardwoods, so we added a very thin piece of wood to raise that side. Added some Liquid Nails to the underside and nailed it in with 1 1/2" brad nails.
Then we started with the one wall side and worked out way across. We actually finished laying the floor in one day! Yes, we worked all day and into the evening.... Whew!
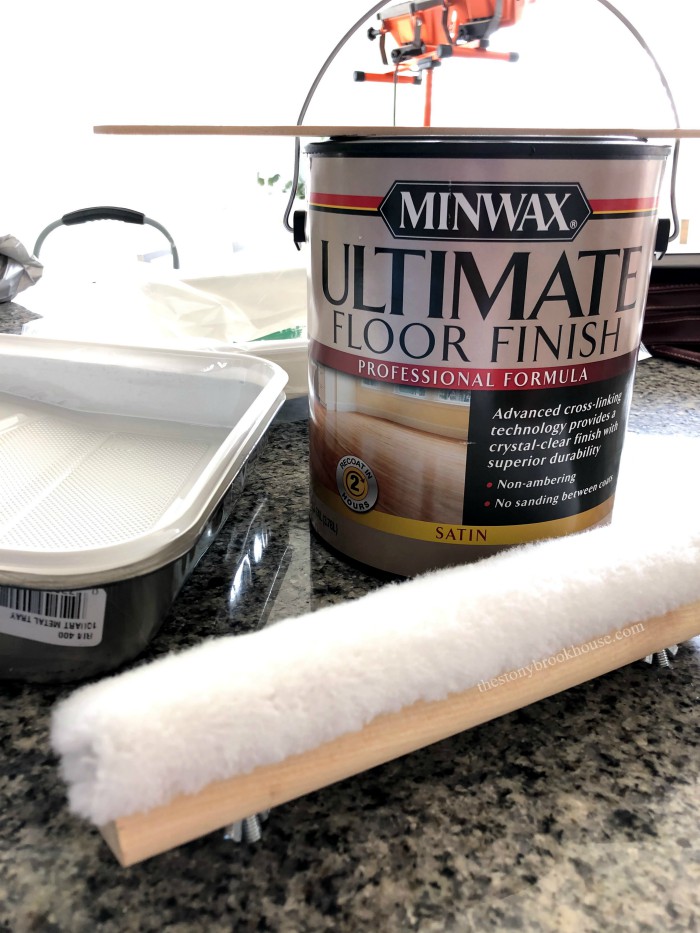
We had a super busy weekend, so I didn't get around to putting the sealer on until Monday. After much debate, I decided to use Minwax Ultimate Floor Finish. I am really happy with how it applied. It was easy to use and dried very fast! No sanding between coats and its so smooth! I ended up putting 3 coats of sealer on. It isn't supposed to yellow, but we'll see... Overall I'm super happy!
You guys!!! Look! It came out so good! It really changed the entire look of the room! We are sooo happy!
Let's look at cost.
Wood- $250
Cutting - $14
Primer - $23
Mineral Spirits - $8
Liquid Nails - $15
Floor Sealer - $80
Total - $390
Not bad! That works out to about $1.30 per square foot.
I just want to say that Hubby was incredible on the project! I love how we work together and make such a great team! 💗
Just for fun I put together some of the timelapses we did into a little video.
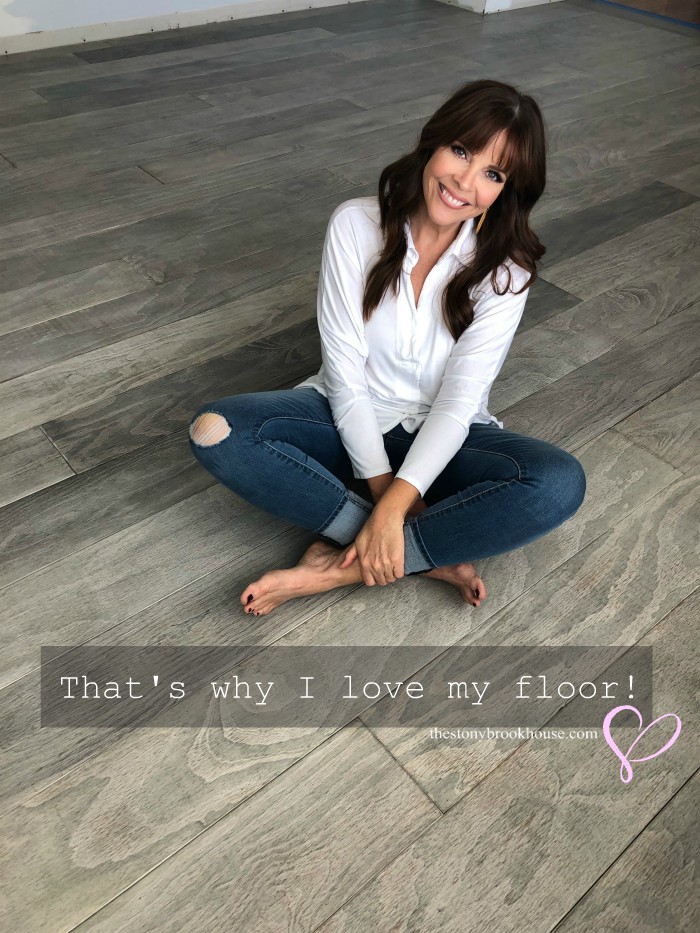
I couldn't be happier!
Blessings!







I love your floor! The color is wonderful & the grain looks good. Do you think it could be made waterproof or water resistant to use in a kitchen or bath or mudroom (with a messy golden retriever)?
ReplyDeleteThanks, Jeannie!! Not really sure... Possibly... I feel like you'd have to be careful with large spills. Thanks for stopping by!
DeleteWow, that looks great! We just finished our plywood flooring project, and we'd love it!! We used a cherrywood gel stain with the same polycrylic you used.
ReplyDeleteHad I seen your floors before I may have opted for the poor man's stain instead.
Really beautiful!
Hi Steve! Thank so much! That's awesome! Who knew plywood floors could look so good!
DeleteWhat did you use to nail your flooring down?
ReplyDeleteHi There! We used 2" nail brads with our nail gun. 👍
DeleteDid you have to fill the holes?
DeleteNope! They were very thin 18 gauge 2" nails. We put them in with a nail gun and they left the tiniest of holes that you never even noticed.
DeleteHow is your flooring holding up? Would you do anything different?
ReplyDeleteHi! We have had these floors for 4 months now and we had a sweet dog living with us for about a month of that time. They have held up terrific!! Are there a couple dog claw marks? Sure, and we are okay with that. We want them to look 'lived in'. Other than that we LOVE them!! And are thinking of installing them in another room later on this year! 😍
DeleteOh! And I can't think of anything we would've done different... 👍
DeleteSo...would I need to prime the plywood board before applying the poormans stain?
DeleteOr did you sand off all the primer before applying stain?
Hi Josey! Hmmm.... that's a good question. I only primed them, because I was going for a white wash look in the beginning. I'm sorry I'm not sure! If I were you, I'd test it out on a piece of scrap to see if the poor man's stain gives you the color you're looking for.
DeleteAwesome!! Love to see how yours turns out!!
ReplyDeleteHi Lori! The floors look fabulous! I am wondering what, if anything, you used for spacers? I have been Pinterest-obsessing over plywood flooring of late, and find some people use them and others don't...
ReplyDeleteMarci
Hi Marci! Thank you! We still love them!! We didn't use any spacers. There are some gaps here and there... we slightly beveled the edges with a sander and that gives the illusion that it's a tongue and grove joint. It's a personal preference. Hope that helps! Blessings!
DeleteHow did you fasten the boards down? Did you face nail?
ReplyDeleteWe just used liquid nails and 2" nail brads with our nail gun. 👍
DeleteJust found your blog and I have to say I'm loving it! You had me smiling when I saw your photo above wearing the yellow top. It reminds me of me when I'm working with my hubby on our home projects.
ReplyDeleteLove your plywood floors and also the Mantle you built!
<3 Lilly
Hi Lilly! Oh! I'm so glad! We love working on projects together too! Thanks for stopping by! It's always an encouragement to hear from readers!
DeleteHi Lori, love your floor project and i’m thinking of doing the same in my house, what did you use to apply the sealer?
ReplyDeleteHi Elena! We used a pad that is for sealing the floor, it worked great. Purchased at Lowes.
ReplyDeleteHow long did it take the sealer/clear coat to dry where you could walk on it and place furniture on it?
ReplyDeleteGreat question! We were able to walk on it within 24 hours. The recommendation on the can of sealer was 7 days, so I'm pretty sure we waited. We were careful not to slide any furniture, and we didn't have our rug yet.
DeleteI tried the stain but when I go to mix the paint and mineral spirits it separates and the paint settles at bottom and gets goopy. What am I doing wrong?
ReplyDeleteThat's really interesting! My first question is what kind of paint are you adding? It needs to be an enamel paint. I used Rustoleum's black enamel paint. It wasn't a mixed paint. I bought it right off the shelf. That's the only thing I can think of.
DeleteSince your mixing mineral spirits with the paint, does the paint need to be an oil based type?
DeleteYes, I believe so. I used an enamel paint and it mixed beautifully. You need very little paint, that's why I bough the quart size can right off the shelf in black.
DeleteIt's just the look that I am looking for. Great job. One question though, What finish of enamel paint did you use? Again great job and thank you.
ReplyDeleteThanks so much!! Sure! I don't know why I didn't put that in the post. I'm going to go back in and add it. I'll even link what I used to Amazon so you can see it. It was Rustoleum Smooth Protective Enamel Paint in Satin Black.
DeleteHi I would like to know if you could share a picture of the black enamel you used in this project.
ReplyDeleteHi Elena!! Sure! I don't know why I didn't put that in the post. I'm going to go back in and add it. I'll even link what I used to Amazon so you can see it. It was Rustoleum Smooth Protective Enamel Paint in Satin Black.
DeleteYour floor is beautiful! Did you cut the 8" wide, 8' long plywood strips into shorter random sizes, or did you just lay the full 8' lengths staggered throughout?
ReplyDeleteThank you so much!! We used the full 8' planks. When we came to the end of a wall, we cut to fit then used the leftover piece starting the next row. That way you get a staggered look. 👍
ReplyDeleteI love your finished look! Did you use spacers as you do with tile or did you just butt the planks next to each other?
ReplyDeleteHi Andra! No, we didn't use any spacers. We just butted each plank right next to each other.
ReplyDeleteThanks for reading!!
Beautiful floor. Currently redoing the master bedroom floor and thinking about doing this same thing. We live in FL and have cement flooring and wondering if you all put down any type of padding like what is used under laminate. Thank you
ReplyDeleteHi Torrie! Thanks so much! We didn't. We had carpet and installed this flooring right over subfloor. We glued it and nailed it in with a nail gun. I'm not sure about cement flooring. Wish I could help more!
DeleteI love this whole look! We will have to tear up our LVP (bought cheap, lesson learned ) and looking for a budget friendly alternative. I was just wondering, have you had issues with the plank edges splintering or coming up at all? Will sanding the edges at a beveled angle help prevent that? I can just hear the questions my husband will come up with!
ReplyDeleteThanks so much! No there have been no issues. We did sand a bevel edge on all of the planks. It also helps to purchase quality plywood. We didn't buy the cheapest and we didn't buy the most expensive. Right in the middle. :)
DeleteHi I am currently following this floor idea but I have noticed the yellow from the wood is bleeding thru, I followed all your steps except the white wash step. What can I do?
ReplyDeleteHi Elena! Isn't that yellowing the pits?? Ugh! I actually think the white wash, helped tone down the yellowing, so that when I stained it, less yellow would come through.
DeleteSo, if I'm understanding correctly, you skipped the priming white wash, and went straight to staining. The only think I can think of is to sand, prime white wash them, then stain again. It's a long process, but you want to be happy with the finished look.
I would try a sample piece and see how it turns out. Hope it works out for you!!
Good morning. Love the floor. My wife and I are restoring an old house built in 1898 in Raeford NC. Has the floored yellowed at all? Did you fill any gaps between the boards to keep dirt and debris from getting in them? If not, is it hard to clean the small gaps? Thank you.
ReplyDeleteHi! Thank you so much! No the floor did not yellow. We butted the floors right next to each other so there were no gaps. I didn't have any problem vacuuming the floors if any debris did fall into them. Plus we had a large rug in our living room. Hope this answers your questions. We were very happy with our floors! Thanks for reading!
DeleteWould you recommend this type of flooring in a messy teenagers room and also a kitchen
ReplyDeleteHi! Sure, I think this flooring would be great for any bedroom. As far as a kitchen, I don't know. I personally, don't care for wood flooring in kitchens. I have this worry that the dishwasher will breakdown and leak all over the floor.... crazy I know. We will be putting LVP in our new kitchen remodel. Thanks for your question!
DeleteSo it’s been a few years how does it look now?
ReplyDeleteHi! Yes, it's been a few years. We did it back in 2019. We ended up selling that house at the end of 2020. So, to be honest, I don't have a clue as to how they've held up. I'm hoping fantastic!
DeleteHow is it holding up?
ReplyDeleteI wish I could say... I'm praying it has fantastically! However, to be honest, we sold the house over 2 years ago.
Delete