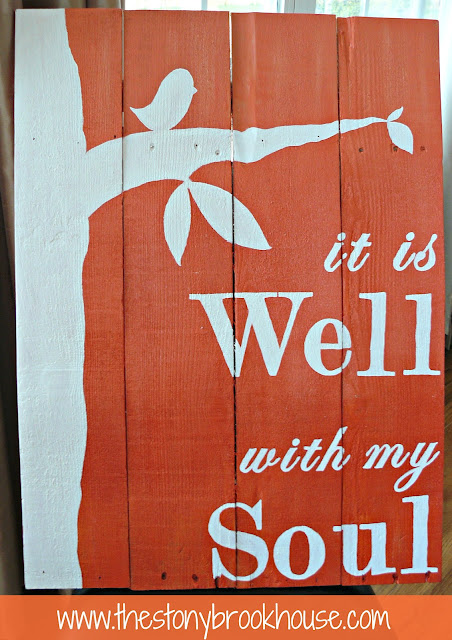
It Is Well Sign -
Here are a couple more that I've made:
Together Sign -
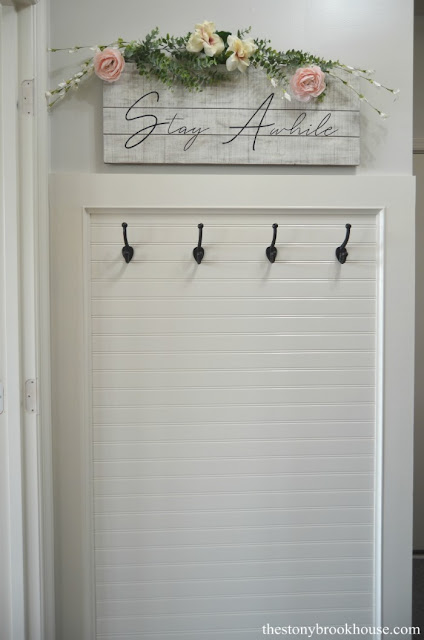
Stay Awhile Sign -
For this particular sign, I used some old underlayment that was left over from shiplapping the walls in our powder room makeover.
This sign was going above my new DIY freestanding laundry tub ❤️❤️❤️. It's not a big space, but I knew it needed to be around 18in. wide. The height didn't matter too much. I was using the 'shiplap' boards that are around 6in. tall. I started with 5 boards, but ended up with 4. I'll explain later...
I just glued some strips on the back to keep the boards together, nothing fancy.
Then I quickly brushed on some paint. I wasn't even careful, I just slapped it on.
I create all of my signs with Microsoft Word. Whatever I want the sign to say, I create it in a document. This is where I can play with different fonts to find the exact look I want. There are so many different fonts to choose from. I've even downloaded a few. There are several sites that offer free downloads.
Once I have my font picked out, then I highlight the entire document and select text effects and choose the outline option without shadow or glow. I prefer to create my signs in an outline format... You know, that way I don't use up so much ink. 😜
Then you need to select the size of your wording. Usually mine is between 200-300, I've even gone as big as 500, just depending on the size of your sign. Then print and figure out the arrangement.
In the next step, go over the letters with pencil on the backside of the paper so the letters will transfer to the wood. On some projects I've used chalk. Then tape them in place, and trace. I like to tape it at the top of the letter so that I can flip it up and look at the transfer. Just to make sure it's working. 👍
Here's a quick video of me making this sign.
Okay, if you look at the words in the above photo, you can see that "Laundry" is already finished. I'm just playing around with placement here. Side note: I wasn't really thrilled with how the word 'life' came out.... so I changed it.
There was a slight indentation of the word after I erased it, but it was fine. Once the new word is there you won't be able to tell.
Now, when you look at this next photo, check out the terrible spacing! And the new font for the word 'life'. The wide gaps between the words feel unnatural, awkward.... great... 😩
What's so nice is that at this stage you can still erase it!! (as long as you didn't press down too hard while tracing.)
Here we go again... That seems a little better. The ruler is acting as the wood frame I'll be putting on this sign. I wanted to make sure that there was enough room for it.
I decided I didn't need that last board, so I just kinda broke it off.
This is where I learned how to speed up the process! I used to hand paint my signs with a teeny tiny brush... I'd have to do 3-4 coats... ugh! Not any more!!!
Paint pens! These are similar to the ones I use, Sharpie Paint Pens. They are genius! One coat and done! I've used them on my Together Sign and Stay Awhile Sign. I even used a paint pen to create subway tile in my Pantry Makeover. I love paint pens! They are my new favorite!
Doesn't that black look gorgeous? It's so dark and solid!
Next up, a simple frame. I keep 1x2s on hand, because the are so versatile! I cut them to fit my sign. No miters, just simple straight cuts. Then stained them with this Minwax Polyshades. It's what I had on hand and it's a nice color.
I use the simplest method to stain. Just dip a rag in the stain and wipe it on! (Gloves help keep the stain off your fingers)
Now, I had to get creative when it came to attaching the frame to the sign.... I didn't want to just glue it. I wanted to use my nail gun to secure it better. Plus I felt it would help keep the sign together. Since I had already just glued some pieces on the back. Looks kinda crazy... but it worked!
Adding the extra pieces around the edge gave me the depth I needed to attach the wood frame without nails showing! Bonus! So I clamped the frame on and nailed it from the backside.
Done!! Love the way this one came out!!
Blessings!


No comments
Post a Comment
Comments are awesome! Let me know what you think!