Updated 6.34.22
This little addition to our Master Bedroom Makeover, just fits perfectly! I am in L O V E!! Who would've thought that a few embroidery hoops, a little greenery and a bit of flowers could make such a HUGE impact??
It was simple and easy to do. So, here's how I did my...
Simple & Easy Embroidery Hoop Wall Art!
This is the blank space I'm working with. I want to tie the hoop art into the circle mirror above my dresser.
Let's start with the hoops. You're going to want them in a variety of sizes. I have 23in, 18in, 14in, 10in, 8in, and 6in hoops.
A big cost saver, is to separate them! There is a solid hoop and one that adjusts. Now you have two of each size!
Okay, now, let's lay it all out.
Basically, get an idea of how you want them to look on the wall.
I started with the largest hoop, put a nail in the wall and hung it. Then, the one next to it. I just tried to eyeball where I wanted it to hang. It's just a nail hole, I made a few extra holes... no big deal, just fill them in after. 😊
Now that I have the placement of the hoops, it's time to add the greenery.
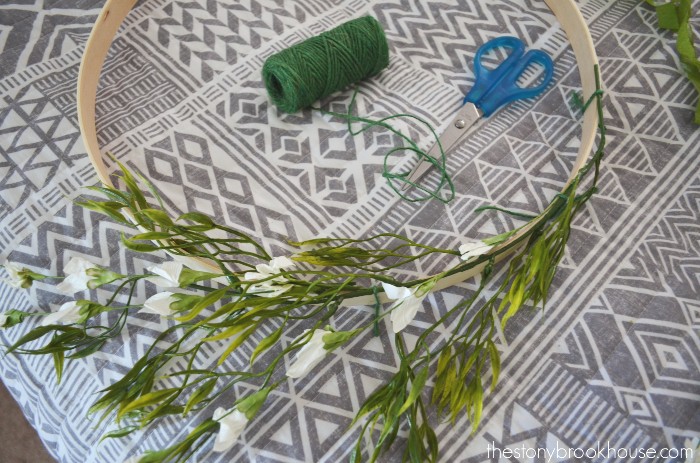
You don't need glue or anything special, just some twine and scissors... and your greenery and flowers of course! Oh, and some wire cutters or pliers that can cut wire.
Just so you know, I bought WAY too much greenery and flowers. I only used one bunch of greenery, and one bunch of paper flowers.
FYI... I bought my large hoops at Hobby Lobby in different weeks so I could use my 40% off. The smaller ones were super cheap at Walmart. I purchased the flowers and greens also at Hobby Lobby when they were 50% off. That made this wall art super cheap!! ❤️
Next, you are going to want to cut the bunches apart. I only used one stem at at time from each bunch. Then I tied each stem in a couple of spots to secure it.
It was nice to tie it, so that if you change your mind where you want the green to fall, you just snip and re-tie. 👍
I didn't want them to be covered in greenery and flowers, just a little bit here and there. Some just have greenery, some just have flowers and some have a bit of both.
Then just keep repeating with each hoop, until you have to look you want.
I did have a problem with the hoops popping off the wall.... I realized that some of my knots were on the back of the hoop, therefore it wasn't flush with the wall.
Some still wanted to pop a bit, so here's a tip! Ticky Tac! If you look real close, you can see a bit of blue Ticky Tac on the side of the largest hoop. It just held it together better. I also used it in another place, somewhere on the wall. Yes, I know it comes in white also... its just what I had on hand. 🤩
I'm just dying! I love it so much! Our bedroom is my favorite place in our home! It has turned out so great and I have one more little project to do!
I love how dainty the paper flowers are!
Hubby loves how the whole room has turned out! It's been a long process, but worth every minute!!
I can't stop with the pictures!!! ❤️❤️❤️
Okay, I'm done!!! Well, one more, in case you want to pin it for later!! ☺️
Blessings,
Lori
Here's a few links to see the progress on our master bedroom!
Master Bedroom MakeoverBedroom Dresser Transformation w/o Sanding
How To Update Old Bookcases Farmhouse Style
How To Transform Your Bed Frame With Paint
How To Build A Shiplap Accent Wall
3 Simple Tips On Styling Bookcases
How To Build A Beautiful Sign Out Of A Door
Easiest Gallery Wall


No comments
Post a Comment
Comments are awesome! Let me know what you think!