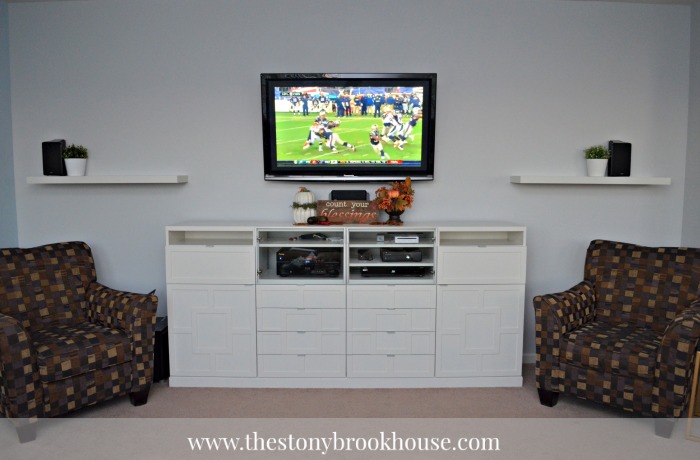
OMG! The difference in my living room is phenomenal!
Seriously, it feels like the sun is shining in there even at night! This is how it looked before. This an old Christmas picture, but you definitely get the feeling for the room.... dark.
But after two coats of primer and 2 coats of paint.... A.M.A.Z.I.N.G!!! I used the same paint from my dining table make over. You can see that
HERE.
I still can't believe it's the same piece of furniture!
If you want to see how I achieved this new look check out
IKEA Bestå Hack Part 1.
This is before I put the base trim on the bottom and the glass doors on the front of the open shelves.
It needed to be raised off the floor, I didn't like how the drawers and doors practically brushed the carpet. That was the easy part. I just used 2x4's on their sides and screwed them in from inside the cabinet and drawer space.
Of course, I should have put the base trim on before bringing it back in the house, but it was
a lot easier carrying each unit in separately. But now the unit had sunk into the carpet and was screwed together. It was quite a job getting the trim under the unit and nailed in place. I could NOT have done it without my wonderful Hubby!! But we did it! :)
I also put the old hardware back on. It seemed like anything else would have distracted from the design. They are so sleek and simple. They blend in nicely with the cabinet. I just l..o..v..e this pattern.
more love....
I've considered putting a wood top on the piece, but I'm not sure. So, I'm just going to leave it for now. So, what do you think? Pretty cool, right??!!
How about another before and after!!!
Before:
After:
Now, it's time to do something about those shelves....
If you want to see how this came together check out
IKEA Bestå Hack Part 1.
Blessings,


