Updated 6.17.2022
*This post contains some affiliate links. Please see my full Disclosure Statement.
So, today I'm going to share how to create the...
Easiest Gallery Wall
Seriously... if I can do it, so can you!!!
First, figure out the size you want your gallery area to be. Then you need to know out how many photos you want and the size of the frames.
I had this huge blank wall that I wanted to fill with a grid of photos, cheaply. (Whoa... this is an old before photo! We've come along way, baby!!)
Cheap being the key word, here! Frames are not cheap! So, I went to the best place to pick up inexpensive (seriously cheap) frames... IKEA.
I picked up 12 of the Ribba Frames. They were $6.99 each. What a steal, that's what I'm talking about!! An 8x10 photo will fit using the mat, which is included!! Perfect!!
The actual size of the frames was 13x17 in. I wanted 2 inches between each frame. You can see here how that works out.
My grid will be 58 inches wide by 55 inches tall. Then you just have to center that on the wall you want. I believe I had 29 inches on each side and my grid started at 36 inches from the bottom.
So, once you have the corners of the grid marked on the wall. Use a level to make marks along the top. This is the first row of your frames. Then add the 17in + 2in =19in to mark the second row. Then add the 19in + 17in + 2 in = 38in to mark your third row.
Now that you have your rows marked the rest is a BREEZE!!! The Ribba frames were super easy to work with. Instead of using their picture frame hardware, I used the corners of the frame to hang them. Plus it kept them from moving once they were up. 👍
Flip the frame over and lay a piece of tape along the exact top of the frame. I used 3M ScotchBlue Edge Lock Tape, it's great for using on painted walls, trim work, designs.... whatever. Not an ad, just a good product! ☺️
Cut the tape along the exact length of the frame and line it up along the top edge of the frame. This is how you get everything to line up perfectly!
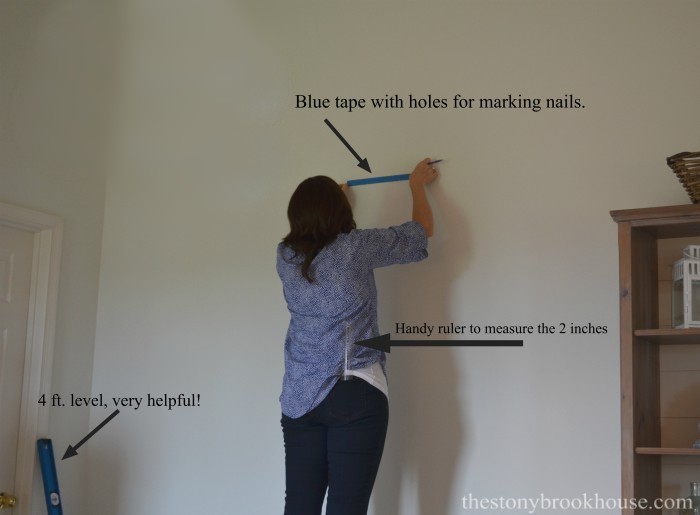
Next, poke a hole in each corner of the frame through the tape with a nail. That's where your nail will be marked on the wall.
Then take your piece of tape off of the frame. Take this piece of tape to the wall and line it up with the top corner of your grid. You should see the lines you made with your level, to line up this piece of tape. Once it's in place, mark where the nails will go with a pencil through the holes you made with a nail.
That's really it! Now it's just a matter of repeating.
This little trick works every time!! This tape method, you can use to hang any frame. Just mark on the tape where you want the nail to go. Simple!
Now, back to the grid... Before you move on, grab a ruler and measure 2 inches from the end of your tape and mark that on the wall. Then move your tape corner to that measurement and repeat the same process. After that row is complete, move onto the next row and then the next.
Once the wall is marked where your nails go in, you're practically done! Hammer your nails in and place your frames. They will come out in a perfectly lined up grid pattern!
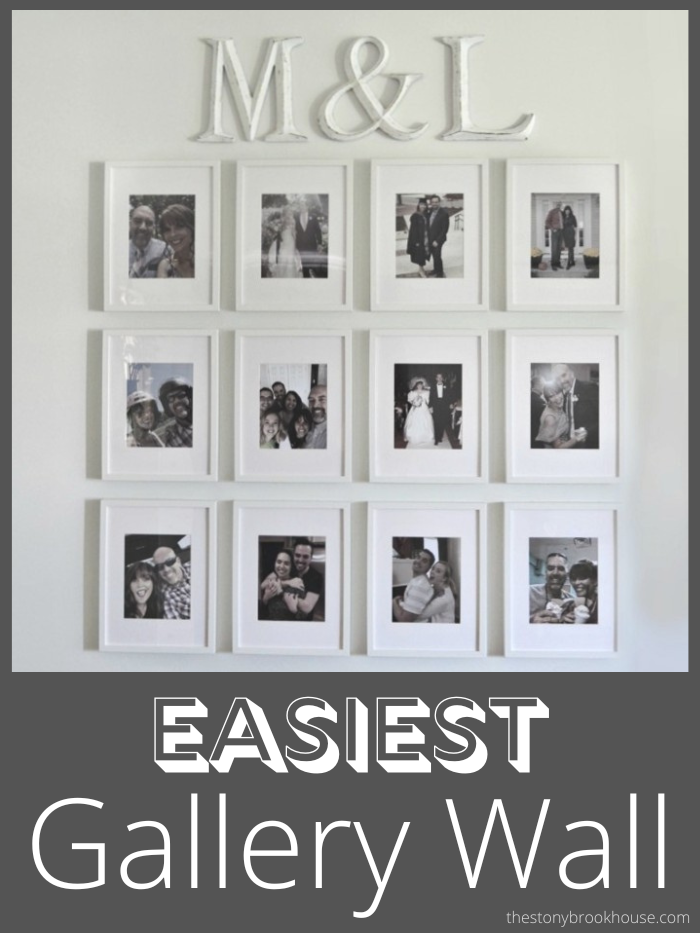
This is how the first, second and third row worked out.
Photographing frames is so tough... the light always bounces off them!
But they look soooo awesome!!
I chose fun photos and blew them up to 8X10 size. I was surprised at how well cell phone photos printed up! For this gallery all of the photos needed to be vertical in order to print the right way.
I am so in LOVE!!! The M & L at the top was gold and I just painted them and sanded a bit. Those letters were a BEAR to put on using the nail holes on the back. The tape method would not work. My solution... Command Velcro Picture Hanging Strips! They worked out PERFECT!!! So easy to use! Just place them on the back and stick to the wall.
Here's all the links to see our Master Bedroom Makeover!
Master Bedroom MakeoverBedroom Dresser Transformation w/o Sanding
How To Update Old Bookcases Farmhouse Style
How To Transform Your Bed Frame With Paint
How To Build A Shiplap Accent Wall
3 Simple Tips On Styling Bookcases
How To Build A Beautiful Sign Out Of A Door


No comments
Post a Comment
Comments are awesome! Let me know what you think!